How to Clean Leather Car Seats at Home Without Damage
You'd think cleaning leather car seats is as simple as grabbing a spray bottle and a rag. But that's exactly how perfectly good interiors get ruined. The truth about how to clean leather car seats at home is that the wrong approach can cause permanent cracking, discoloration, and a loss of resale value that costs you hundreds or thousands of dollars.
Here's the thing most people don't realize: automotive leather isn't raw hide. It's coated with a protective finish that's easily stripped by common household cleaners. As of 2026, manufacturer specifications from brands like BMW, Lexus, and Honda consistently warn against using anything but pH-balanced products designed specifically for automotive leather.
Get this wrong, and you're not cleaning, you're damaging.

Image source: YouTube / ChrisFix (YouTube thumbnail (fair-use with source credit))
Quick Answer
Clean leather car seats with a pH-balanced leather cleaner. Apply it with a soft microfiber towel. Gently agitate with a soft brush.
Wipe away residue with a damp cloth. Let the seats dry completely. Then apply a leather conditioner.
Buff off the excess. Repeat every two to three months. Never use household cleaners.
Why Cleaning Leather Car Seats the Wrong Way Costs You Real Money
Leather car seats are expensive. Replacing or reupholstering a single seat can run $200 to $800. A full interior redo?
Thousands. And yet, the most common approach people take is grabbing whatever cleaner is under the kitchen sink.
Aggregate user reviews and detailing community reports show that dish soap, all-purpose cleaners, and even baby wipes are among the top causes of premature leather damage. These products strip the protective topcoat. Once that coating is gone, the leather underneath absorbs dirt, dries out faster, and cracks.
The financial hit doesn't stop at replacement costs. A car with cracked, faded, or stained leather seats sells for significantly less. Trade-in values drop.
Private sales stall. In our research, a well-maintained leather interior can add $1,000 to $3,000 to a used car's resale value compared to one with neglected seats.
So yes, cleaning your seats the right way takes a little more effort. But consider it an investment. Every time you clean properly, you're protecting the value of your vehicle.
What Kind of Leather Are Your Seats? (And Why It Matters)
Not all leather is the same. And the type of leather in your car determines exactly how you should clean it.
Coated (Pigmented) Leather — What Most Cars Have
About 90 percent of cars with leather interiors use pigmented leather. It has a factory-applied protective coating that gives it a uniform color and texture. This coating is durable.
It resists stains and fading. But it's also sensitive to harsh chemicals.
If you own a mainstream vehicle from Toyota, Honda, Ford, BMW, or Mercedes, you almost certainly have coated leather. The good news? It's the easiest type to clean at home.
The coating acts as a barrier, so you don't need to be as delicate as you would with untreated leather. But that coating is also easy to strip with the wrong products.
Aniline and Semi-Aniline Leather — Rare But Delicate
Higher-end luxury cars sometimes use aniline or semi-aniline leather. These are softer, more natural hides that lack a heavy protective coating. Brands like Bentley, Rolls-Royce, and some Lexus models use them.
These leathers absorb moisture and dirt much faster. They stain easily. And they require specialized cleaners that are much gentler.
If you're not sure what you have, check your owner's manual or look for a label under the seat. When in doubt, assume you have coated leather, it's the safe bet.
How to Check
Look at the edge of your seat where the leather meets the plastic trim. If you see a visible layer or coating, you're dealing with pigmented leather. If the texture looks and feels like natural hide with visible pores and no obvious coating, you may have aniline leather.
For most people reading this, it's coated.
The Hard Truth About Household Cleaners on Leather
Let's be direct about this. Using household cleaners on leather car seats is one of the fastest ways to ruin them.
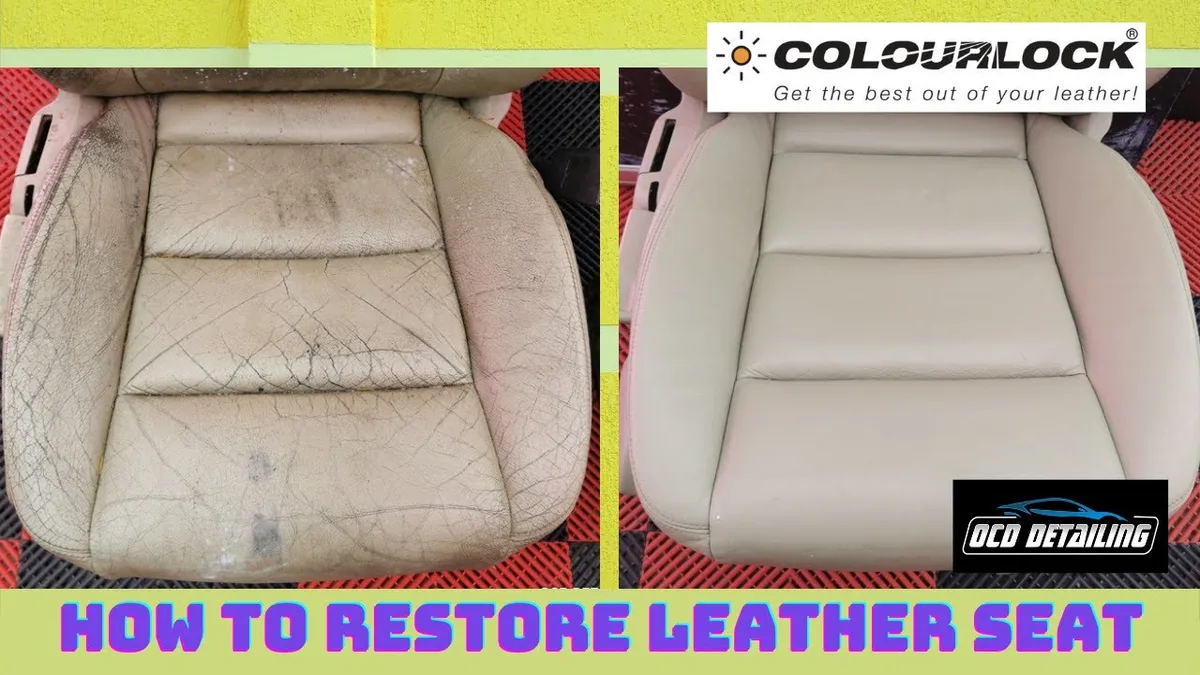
What Not to Use
Product Why It Damages Leather
Dish soap Strips protective oils and coating
All-purpose cleaners Often too alkaline, pH around 9-11
Glass cleaners Contains ammonia, dries out leather
Vinegar Too acidic, eats away at coating
Baby wipes Contain alcohol and fragrances that degrade leather over time
Bleach or bleach-based Destroys color and finish permanently
What Happens Over Time
One wash with dish soap might not cause visible damage. But each time you use it, you're thinning that protective coating. After five or six cleanings, the leather starts looking dull.
Then it feels dry. Then tiny cracks appear. By the time you notice, the damage is done.
Online detailing communities report that improper cleaning is the number one cause of premature leather failure in vehicles under ten years old. And once the coating is compromised, no conditioner can fully restore it.
The fix isn't expensive. It's just a different product. A dedicated leather cleaner costs $10 to $20 and lasts for dozens of cleanings.
That's cheaper than a single detailing session.
What You Actually Need: The Short List of Safe Tools and Products
You don't need a garage full of detailing supplies. You need six things, and most of them are cheap.
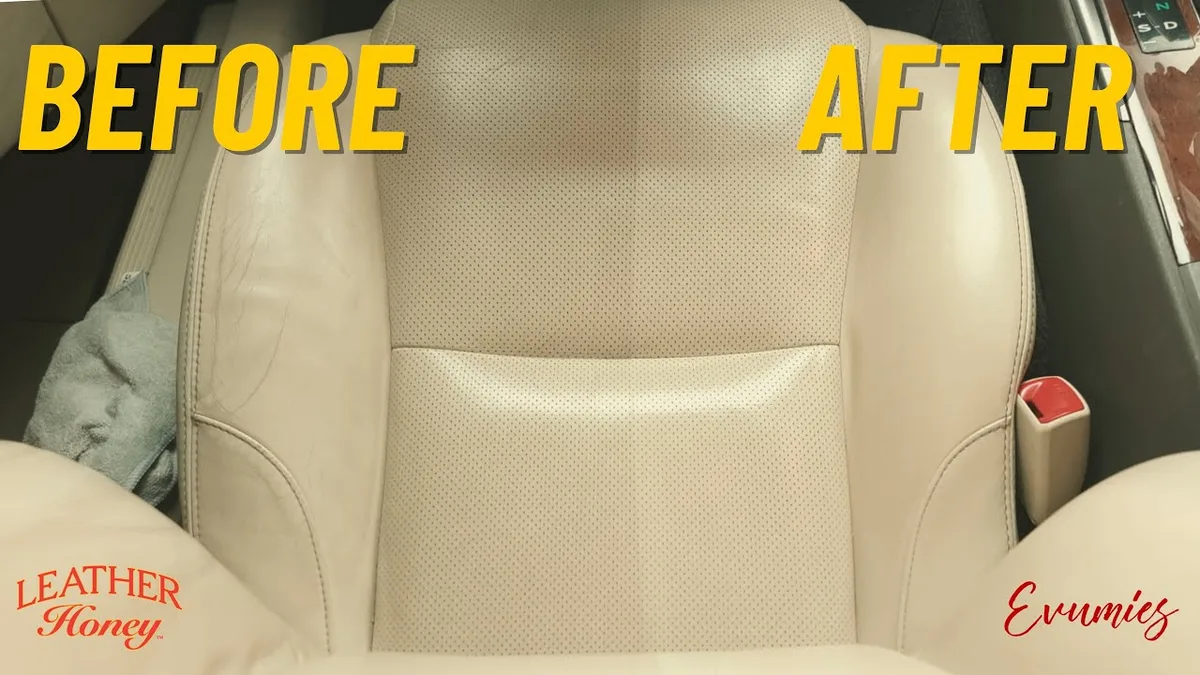
The Essential Six
pH-balanced leather cleaner , Look for something labeled "pH-neutral" or "pH-balanced" specifically for automotive leather. Avoid anything that says "all-purpose" or "multi-surface."
Leather conditioner , This replaces oils that cleaning removes. Get a dedicated automotive leather conditioner, not a general leather lotion.
Two or three microfiber towels , Get high-quality, 300-400 GSM (grams per square meter) towels. Cheaper ones can scratch.
Soft-bristle brush , A horsehair detailing brush or a soft nylon brush works. A clean toothbrush works in a pinch, but be gentle.
Vacuum with upholstery attachment , To remove loose dirt before you start cleaning.
Distilled water , Tap water can leave mineral deposits on leather. Distilled water is cheap and avoids that.
What You Don't Need
Steam cleaners (can delaminate the leather coating)
Electric scrubbers (too aggressive)
Saddle soap (too waxy, can leave residue on coated leather)
Homemade cleaners made from vinegar or baking soda
Total cost for the essentials: around $30 to $50. That covers multiple cleanings. Compare that to $100 to $200 for a professional interior detail.
Step-by-Step: How to Clean Leather Car Seats at Home Without Damage
Here's the exact process. Follow these steps in order, and your seats will look great without any risk.
Step 1: Vacuum Thoroughly
Start by vacuuming the entire seat surface. Use the upholstery attachment to get into the crevices where the seat meets the backrest and the side bolsters. Crumbs, dust, and grit act like sandpaper when you start wiping.
Removing them first prevents micro-scratches.
Pay extra attention to the seams. Dirt collects there and can stain over time.
Step 2: Test in a Hidden Spot
Before you put anything on the main seating area, test your cleaner on a small, hidden section. Try underneath the seat or the back of the headrest. Apply a small amount, wipe it off, and let it dry.
Check for discoloration or dullness. If it looks fine, proceed.
This takes two minutes. It can save you from a expensive mistake.
Step 3: Apply the Cleaner
Spray the cleaner directly onto a microfiber towel, not onto the seat. This keeps you from over-saturating the leather. You want the towel damp, not wet.
Wipe the seat in sections. Start with the top of the backrest and work your way down. Use light pressure.
Let the cleaner do the work.
Step 4: Agitate Gently
For areas with visible dirt or stains, use your soft brush. Light circular motions for 10 to 15 seconds. Don't scrub hard.
The brush just helps loosen dirt that's embedded in the grain.
Avoid using the brush on delicate areas like perforated leather. The bristles can catch on the holes and cause damage.
Step 5: Wipe Away Residue
Dampen a clean microfiber towel with distilled water. Wipe the seat to remove any leftover cleaner. Don't soak the towel.
You want it just damp enough to lift the residue.
Let the seats air dry for 15 to 30 minutes. Open your car doors or windows to speed things up. The leather should feel dry to the touch before you move to conditioning.
Step 6: Apply Conditioner
Once the seats are dry, apply a small amount of leather conditioner to a clean microfiber towel. Rub it into the leather in circular motions. A little goes a long way.
You want a thin, even layer.
Let the conditioner sit for 10 to 15 minutes. Then buff off any excess with a dry towel. If the leather feels greasy or looks shiny, you used too much.
Buff it down until it looks natural.
Step 7: Let It Cure
Ideally, let the seats sit for 24 hours before anyone sits on them. This gives the conditioner time to fully absorb. If you can't wait that long, at least give it a few hours.
Sitting on freshly conditioned leather can create uneven spots and transfer product to your clothes.
Step 8: Maintain Regularly
Clean your leather seats every two to three months. Condition them every other cleaning, or every third cleaning if you live in a humid climate. More frequent conditioning is better in dry, sunny areas where leather dries out faster.
This routine keeps the leather supple, prevents cracking, and maintains that factory-fresh look without expensive professional detailing.
The Most Common Mistakes That Ruin Leather (And How to Avoid Them)
Even with the right products, people still make mistakes. Here are the ones we see most often.
Over-Wetting the Seats
This is the biggest one. People spray cleaner directly onto the seat and use too much. The liquid seeps down into the foam padding underneath.
That trapped moisture creates mold and mildew. It can also cause the leather to delaminate from the foam.
Always spray onto your towel, not the seat. Your towel should be damp, not dripping. If you accidentally oversaturate a spot, blot it dry with a clean towel immediately.
Using Too Much Conditioner
More conditioner is not better. Excess product sits on the surface and attracts dust and dirt. It can also transfer to your clothes and stain them.
Apply a thin layer. Let it absorb. Buff off any excess.
If the leather still feels greasy after 15 minutes, you used too much.
Scrubbing Hard
Leather is durable, but it's not indestructible. Aggressive scrubbing with a stiff brush can scratch the coating. Once that coating is scratched, dirt gets trapped in those tiny grooves.
Use light pressure. Let the cleaner and brush do the work. If a stain isn't coming off with gentle agitation, it needs a different approach, not more elbow grease.
Skipping the Vacuum Step
Dirt and grit that sit on the surface get ground into the leather when you start wiping. This creates micro-scratches that dull the finish over time.
Always vacuum first. It takes two minutes and makes a huge difference.
Cleaning in Direct Sunlight
Heat causes cleaners and conditioners to dry too quickly. This leaves residue and streaks. It can also cause the leather to dry out unevenly.
Park in the shade or a garage. Clean when the seats are cool to the touch.
When to Condition vs. When to Protect — and What's the Difference
These two terms get used interchangeably, but they're not the same thing.
Conditioning: Feeding the Leather
Conditioner replaces the natural oils that cleaning removes. Leather is skin. It needs moisture to stay flexible.
Without conditioning, the leather dries out, stiffens, and eventually cracks.
Think of conditioner as moisturizer for your seats. It penetrates the leather and keeps it supple. You should condition every time you clean, or every other cleaning if you're on a tight schedule.
Protecting: Shielding the Surface
Protectants add a layer on top of the leather. They block UV rays and repel water and stains. This is an extra step, not a replacement for conditioning.
If you park outside or live in a sunny climate, a protectant is worth adding. Apply it after the conditioner has fully absorbed. Use a dedicated automotive leather protectant, not a general interior spray.
Which One Do You Need?
Situation Recommended Action
Normal use, garage parked Condition every other cleaning
Outdoor parking, sunny climate Condition every cleaning, add protectant
Dry climate (Arizona, Colorado) Condition every cleaning
Humid climate (Florida, Gulf Coast) Condition every other cleaning, skip protectant
Older leather showing cracks Condition every cleaning until improvement
Aggregate owner feedback across forums suggests that most people over-condition and under-protect. If you have to pick one, pick conditioning. But both together gives you the best results.
How Often Should You Clean and Condition? A Realistic Schedule
Consistency matters more than intensity. A simple routine beats a once-a-year deep clean.
Cleaning Frequency
Condition Recommended Schedule
Normal daily driving Every 2 to 3 months
Heavy use (kids, pets, commute) Every 1 to 2 months
Light use (weekend car) Every 4 to 6 months
Visible dirt or stains Clean immediately
Conditioning Frequency
Condition Recommended Schedule
Normal use Every other cleaning
Dry climate Every cleaning
Older leather Every cleaning
Humid climate Every third cleaning
What Happens If You Skip
Skipping one cleaning cycle isn't a disaster. But regularly going six months or longer between cleanings allows dirt to build up. That dirt acts like sandpaper, wearing down the coating over time.
Skipping conditioning is worse. Leather that never gets conditioned will dry out, shrink slightly, and crack along the seams. Those cracks are permanent.
No amount of conditioner will fix them once they appear.
A Realistic Routine
Set a calendar reminder. Every two months, vacuum your seats and give them a quick wipe with a damp microfiber towel. Every four months, do a full clean and condition.
That's four to six times a year. It takes about 30 minutes per session.
That small investment of time protects a thousand-dollar investment in your car's interior.
What About Stains? Coffee, Ink, Grease, and Pet Messes
Stains happen. The key is acting fast and using the right approach for each type.
General Stain Rule
Blot, don't rub. Rubbing spreads the stain deeper into the leather grain. Blotting lifts it out.
Use a clean, dry microfiber towel and press gently.
Work from the outside of the stain inward. This keeps it from spreading.
Coffee and Drinks
Blot up as much liquid as possible. Then use your regular leather cleaner on a damp towel. Gently wipe the area.
If the stain remains, let the cleaner sit for 30 seconds before wiping.
For dried coffee stains, dampen the area first with distilled water. Let it sit for a minute to rehydrate the stain. Then clean normally.
Ink Stains
Ink is tricky. Ballpoint pen ink can sometimes be lifted with a leather-specific cleaner. Let it sit for a minute, then blot.
For permanent marker or gel ink, you may need a specialized leather ink remover. Test it on a hidden area first. Never use rubbing alcohol or nail polish remover.
Those will strip the leather's color.
Grease and Oil
Food grease, hand lotion, and sunscreen are common culprits. Blot up any excess. Sprinkle a small amount of cornstarch or baking soda on the stain.
Let it sit for 15 minutes to absorb the oil. Then vacuum it off and clean normally.
Do not rub the cornstarch in. Just let it sit on top.
Pet Messes
Mud and dirt from pets should be vacuumed first. Let the mud dry completely, then vacuum it up. Don't try to wipe wet mud.
You'll just smear it.
For pet drool or urine, blot immediately. Clean with a mild leather cleaner. Then condition thoroughly.
Urine can be acidic, so prompt cleaning is important.
Stubborn Stains
If a stain doesn't come out after two cleaning attempts, stop. Repeated scrubbing will damage the leather. At that point, consider a professional detailer who specializes in leather.
When You Should Call a Professional (And When You Can DIY)
Most leather cleaning can be done at home. But there are clear situations where professional help is the better choice.
DIY Is Fine When
Your seats have normal daily dirt and dust
You have light stains from drinks or food
You're following a regular maintenance schedule
You have the right tools and products
The leather is in good condition with no cracks or damage
Call a Professional When
The leather is already cracked or peeling
You have deep-set stains that won't budge
The seats have a musty smell (possible mold)
You're dealing with ink or dye stains
The leather feels rough or sticky (coating may be failing)
You want a full interior restoration before selling the car
What Professionals Offer
A professional detailer can do things you can't easily do at home. They have steam cleaners for deep cleaning (done carefully). They use industrial-grade extractors.
They can apply professional-grade conditioners and sealants.
Expect to pay $50 to $150 for a full leather seat cleaning and conditioning. That's a reasonable investment if your seats are in rough shape or if you just want a perfect result for a special occasion.
The Smart Approach
Do your own maintenance throughout the year. Clean and condition every two to three months. Then, once a year, treat yourself to a professional detail.
This keeps your seats in excellent condition without breaking the bank.
For most people, the DIY approach covered in this article is all you'll ever need. The key is doing it right and doing it consistently.
Long-Term Care: Keeping Leather Soft and Crack-Free for Years
The key is prevention. Park in the shade when you can. Use a sunshade on the windshield.
Heat and UV rays are leather's worst enemies.
Wipe down your seats with a dry microfiber towel every week. This removes dust before it embeds into the grain. It takes 30 seconds.
Follow the cleaning and conditioning schedule we covered. Do that consistently, and your leather will outlast the rest of the car.
Quick Reference: Safe vs. Unsafe Products at a Glance
Safe to Use Never Use
pH-balanced leather cleaner Dish soap
Automotive leather conditioner All-purpose cleaner
Distilled water Glass cleaner with ammonia
Soft microfiber towels Vinegar or bleach
Horsehair detailing brush Baby wipes
Cornstarch (for oil stains) Saddle soap on coated leather
Final Takeaway: One Simple Routine That Works
Vacuum first. Clean with a dedicated leather product. Condition after drying.
Do this every two to three months.
That's it. Thirty minutes per session. No expensive tools.
No risk of damage.
Your leather seats will stay soft, supple, and valuable for as long as you own the car.
Frequently Asked Questions
Can I use baby wipes on leather car seats?
No. Baby wipes contain alcohol and moisturizers that degrade the leather's protective coating over time. They leave a residue that attracts dirt.
Use a dedicated leather cleaner instead.
How do I remove ink from leather car seats?
Blot the ink with a dry microfiber towel. Apply a leather-specific cleaner and let it sit for 60 seconds. Blot again.
For stubborn ink, use a dedicated leather ink remover. Never use rubbing alcohol.
Is vinegar safe for cleaning leather car seats?
No. Vinegar is too acidic. It strips the protective coating and can cause the leather to dry out and crack.
Stick with a pH-balanced leather cleaner.
How often should I condition my leather car seats?
Condition every other cleaning for normal use. In dry or sunny climates, condition every cleaning. In humid climates, every third cleaning is enough.
Over-conditioning leaves a greasy residue.
Can I use a steam cleaner on leather seats?
It's risky. Steam can penetrate the seams and delaminate the leather from the foam padding. Professional detailers have the equipment to do it safely.
At home, stick with the clean and condition method.