Best Leather Car Seat Cleaners for a Spotless Interior
What can I clean my leather car seats with? It’s a simple question, but the wrong answer can cost you thousands. Walk into any auto parts store and you’ll see shelves of sprays, wipes, and foams all claiming to be safe for leather.
Many of them will damage your seats over time.
Manufacturer specifications indicate that most automotive leather is coated with a protective polymer finish. Treating it like raw leather or household furniture leads to cracking, fading, and discoloration. As of 2026, the safest approach starts with one simple rule.
Here’s what actually works.
Quick Answer
Use a pH-neutral leather cleaner made for automotive interiors. Mix a few drops of mild Castile soap with distilled water as a homemade alternative. Apply with a damp microfiber cloth.
Never use vinegar, saddle soap, or all-purpose cleaners. Always test on a hidden spot first.
Why Leather Seat Cleaning Goes Wrong (and How to Avoid It)
The biggest mistake people make is treating leather car seats like leather shoes or furniture. Automotive leather is different. It’s coated with a factory finish that protects the leather underneath.
Harsh cleaners strip that finish.
Another common error is using too much water. Leather car seats have foam padding underneath. Oversaturating the seat leads to mold and mildew in the foam.
It also causes the leather to stretch and warp.
The third mistake is skipping the identification step. Not all leather is the same. Coated leather needs different care than uncoated leather.
Using the wrong product on the wrong type is a recipe for disaster.
The good news is that avoiding these mistakes is straightforward. You just need to know what you’re working with before you start. That’s where the next section comes in.
The One Rule You Can't Skip: Know Your Leather Type
Before you touch any cleaner, you need to know what kind of leather you’re dealing with. This single step determines everything else. If you skip it, you’re guessing.
And guessing is how seats get ruined.
Here’s how to check. Look at your owner’s manual. Most manufacturers list the interior material specifications.
If you don’t have the manual, check the manufacturer’s website for your model year. Brands like BMW, Lexus, and Mercedes often provide detailed care instructions.
If you can’t find the official specs, do a simple water test. Put a few drops of water on an inconspicuous spot. The side of the seat or the bottom edge works well.
If the water beads up and sits on the surface, you have coated leather. If it soaks in and darkens the leather, you have uncoated leather.
This test takes 30 seconds and saves you from expensive mistakes. It’s the single most important step in the entire process. Knowing your leather type also helps you choose the right products for keeping your seats properly maintained.
Coated vs. Uncoated – The Two Big Branches

This is the decision tree’s first real fork. Your cleaning method changes completely based on which type you have. There is no one-size-fits-all solution.
What Coated (Pigmented) Leather Needs
Coated leather is the most common type in cars. It has a polymer layer applied over the top. This layer protects the leather from stains, UV damage, and wear.
It’s also what makes cleaning easier.
For coated leather, use a pH-neutral cleaner. Wipe gently with a microfiber cloth. Avoid abrasive scrubbing.
The coating is durable but not indestructible. Scrubbing too hard can wear through the protective layer.
You can use a soft horsehair brush on coated leather if needed. It helps lift dirt from the grain. Just keep the pressure light.
The goal is to clean the surface, not scrub it raw.
What Uncoated (Aniline) Leather Needs
Uncoated leather is rare in modern cars. You’ll find it mostly in luxury vehicles from brands like BMW, Mercedes, and Lexus. It has no protective layer.
It’s porous and absorbs everything.
For uncoated leather, use a cleaner specifically labeled for aniline or semi-aniline leather. These are gentler and don’t contain harsh chemicals. You must also be more careful with liquids.
The leather will absorb them quickly.
Never use a brush on uncoated leather. The bristles can scratch and damage the surface. Stick to a soft microfiber cloth.
And always dry the area immediately after cleaning to prevent water stains.
Step-by-Step Workflow – How to Clean Leather Car Seats Right
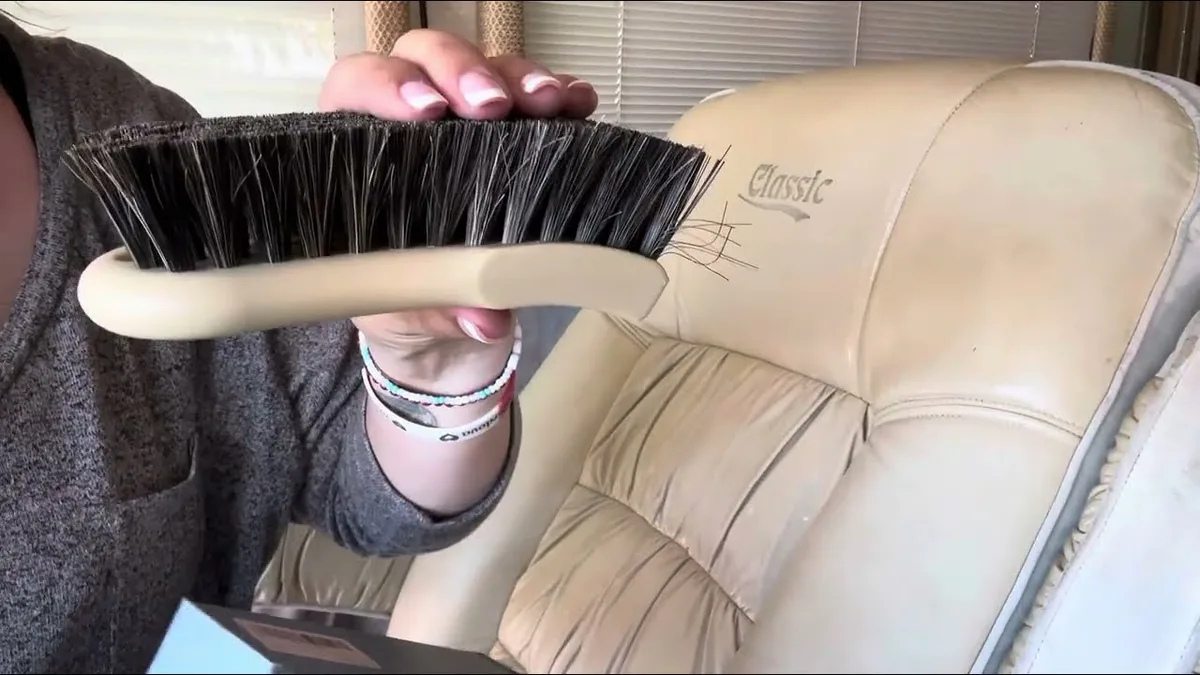
Now that you know your leather type, here’s the actual process. Follow these steps in order. Don’t skip any of them.
Step 1: Vacuum the seats. Remove loose dirt, crumbs, and dust from the surface and crevices. Use a soft brush attachment to avoid scratching the leather. Pay special attention to the seams and edges where dirt collects.
Step 2: Test your cleaner. Apply a small amount to a hidden area. The bottom seam or under the seat works well. Wait 30 seconds.
Check for any discoloration or damage. If everything looks good, move on.
Step 3: Apply the cleaner. Spray it onto a microfiber cloth, not directly onto the seat. This prevents oversaturation. Too much liquid seeps into the foam and causes problems down the line.
Step 4: Wipe in circular motions. Use light pressure. Don’t scrub hard. Let the cleaner do the work, not your elbow.
Focus on one section at a time. Work from top to bottom.
Step 5: Wipe away residue. Use a clean, damp microfiber cloth to remove any leftover cleaner. Then dry with a separate dry cloth. This step is critical.
Leaving residue on the seat attracts dirt and causes buildup.
Step 6: Condition the leather. Apply a leather conditioner to keep it supple. Let it absorb for 10 to 15 minutes. Then buff off any excess.
Conditioning prevents cracking and keeps the leather looking new.
This whole process takes about 15 minutes per seat. For a full interior, budget about an hour. If you’re dealing with specific stains or odors, check out our guide on handling biological messes for extra help.
What to Use (and What to Never Use)
This section covers the specific products and ingredients that work, and the ones that don’t. Use this as a quick reference when you’re shopping or reaching for something under the sink.
Safe Cleaners: pH-Neutral, Dedicated, or Mild Soap
The safest option is a dedicated automotive leather cleaner. Look for one labeled pH-neutral. These are formulated to clean without stripping the factory finish.
They’re widely available and reasonably priced.
If you prefer a homemade solution, mix a few drops of liquid Castile soap with distilled water. Baby shampoo also works in a pinch. Both are mild enough for coated leather.
Just make sure you dilute them properly. A few drops per cup of water is plenty.
For uncoated leather, stick with products specifically designed for aniline leather. These are even gentler. They contain fewer surfactants and no harsh solvents.
Products to Avoid: Vinegar, Saddle Soap, All-Purpose Cleaners
Vinegar is acidic. It eats away at the protective coating on leather. Despite what you might read online, it’s not a safe cleaner for automotive leather.
The same goes for lemon juice and other acidic household products.
Saddle soap is designed for raw leather, not coated automotive leather. It leaves a waxy residue that attracts dirt and damages the finish over time. It also strips the factory coating.
Save it for your boots, not your car seats.
All-purpose cleaners are too harsh. They contain degreasers and solvents that strip the leather’s protective layer. Dish soap is also too aggressive.
It dries out the leather and causes cracking.
Here’s a quick reference table:
| Product | Coated Leather | Uncoated Leather | Notes |
|---|---|---|---|
| pH-neutral leather cleaner | Safe | Safe | Best all-around option |
| Castile soap + water | Safe | Use with caution | Good homemade alternative |
| Baby shampoo + water | Safe | Use with caution | Works in a pinch |
| Vinegar | Unsafe | Unsafe | Strips coating |
| Saddle soap | Unsafe | Unsafe | Leaves damaging residue |
| All-purpose cleaner | Unsafe | Unsafe | Too harsh for both types |
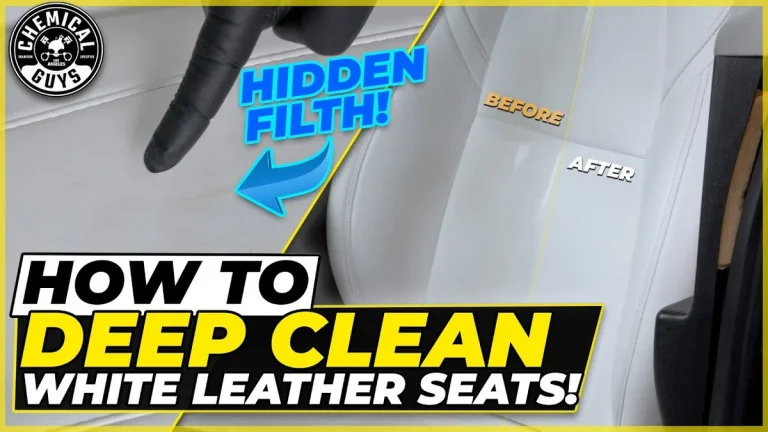
Stick to the safe options and you’ll avoid most common problems. If you’re dealing with white leather or lighter interiors, pay extra attention to your cleaner choice. That type of seat shows damage faster.

Mistakes That Ruin Leather (and How to Spot Them Early)
Even with the right cleaner, small errors add up. The most common mistake is using too much pressure. Scrubbing hard with a stiff brush wears through the protective coating.
You won't see the damage immediately. It shows up months later as dull patches or cracking.
Another frequent error is applying conditioner before cleaning. Conditioner seals dirt into the pores. You end up locking grime into the leather rather than removing it.
Always clean first, condition second.
Oversoaking is another problem. Spraying cleaner directly onto the seat lets liquid run down into the seams and foam. This causes mildew and a musty smell.
Always spray onto the cloth, not the seat.
Skipping the drying step also causes trouble. Wet leather left to air dry can develop water stains and shrinkage. Dry each section immediately with a separate microfiber cloth after cleaning.
The easiest way to spot early damage is to look for color changes. If the leather appears lighter in one spot after cleaning, you may have stripped the finish. Stop using that product immediately.
How Often to Clean and Condition (Realistic Schedule)
Frequency depends on usage and climate. For most daily drivers, a full clean and condition every 2 to 3 months is enough. This keeps sweat, oils, and dust from building up.
If you live in a hot climate with intense sun, condition more often. UV rays dry out leather faster. Condition every 6 to 8 weeks in desert or tropical regions.
Use a conditioner with UV protection for added insurance.
For vehicles with leather that sees heavy use, like a family car with kids or pets, clean every 4 to 6 weeks. Spills and dirt accumulate quickly. Spot clean stains as they happen, but stick to the full routine on a regular cadence.
In cold climates, seat heaters speed up moisture loss. Extra conditioning in winter helps prevent cracking. Follow the same schedule but pay attention to stiffness.
If the leather feels dry to the touch, it's time to condition earlier than planned.
Light cleaning with a damp microfiber cloth can happen weekly. Just wipe the surface gently. Full conditioning only happens every few months.
Real-World Scenarios – Stains, Sweat, Sun Damage, and Odor
Real life doesn't always fit a neat routine. Here's how to handle common problems that pop up between regular cleanings.
Ink stains. Ink from pens or markers is tricky. Dabbing with 70% isopropyl alcohol on a cotton swab works on coated leather. Test on a hidden spot first.
Apply gently, then wipe clean. Don't rub, because that spreads the ink.
Sweat and body oils. These build up on the driver and passenger seats over time. They cause dark, glossy spots. A mild cleaner and a horsehair brush lift these oils.
For sweat stains, our detailed walkthrough on cleaning general stains covers the approach well.
Sun damage and fading. Once the color fades, you can't reverse it with cleaning. Prevention is the only cure. Park in the shade or use a windshield sunshade.
Condition regularly with UV protectant. If the damage is already visible, a professional re-dye service is your only option.
Odors. Musty smells usually come from moisture trapped in the foam. Dry the seats thoroughly after cleaning. For food or pet odors, sprinkle baking soda on the seat and let it sit for 15 minutes before vacuuming.
Never use a harsh chemical deodorizer directly on leather.
Pet stains. Urine and dirt from pets soak in fast. Blot immediately with a dry cloth. Follow up with a mild cleaner.
If the stain persists, see our guide on handling pet-related messes and tougher stains.
Decision Guide – Pick Your Path in 30 Seconds
This table lets you find your situation and see exactly which method to use.
| Your situation | Leather type | Cleaner | Brush? | Condition? | Extra step |
|---|---|---|---|---|---|
| Routine clean | Coated | pH-neutral spray | Yes, horsehair | Yes | Wipe dry immediately |
| Routine clean | Uncoated | Aniline-specific | No (cloth only) | Yes | Dry immediately, no soaking |
| Sweat / oil buildup | Coated | pH-neutral spray | Yes, horsehair | Yes | Repeat if spot stays |
| Ink stain | Coated | 70% isopropyl alcohol | No (cotton swab) | After cleaning | Test hidden spot first |
| Sun exposure (any) | Both | Standard | N/A | UV-block conditioner | Reapply every 6-8 weeks |
| Odor (musty) | Both | Standard | N/A | After cleaning | Bake soda on seat 15 min |
| Pet stain | Coated | Mild soap + water | No (blot only) | After cleaning | Blot don't rub |
Use this as your cheat sheet. It covers 90 percent of what you'll encounter.
Safety and Warranty – What Your Owner's Manual Actually Says
Your owner's manual is the most authoritative source for your specific car. Most luxury and mainstream automakers explicitly warn against using harsh chemicals on leather interiors. They also recommend specific pH-balanced cleaners.
Using products that damage the leather can void parts of your warranty. Manufacturers consider the interior a wear item, but damage caused by improper cleaning is not covered. If you strip the coating or crack the leather, the repair cost falls on you.
Lexus, BMW, and Mercedes all publish official interior care guides online. These guides agree on the basics: use a soft cloth, avoid soaking, and never use ammonia or alcohol. Check your brand's guide for model-specific advice.
For example, the Lexus interior maintenance page provides detailed dos and don'ts that apply widely across their lineup.
The safest approach is to follow the manufacturer's recommendations and stick to products that match those specifications. If you're unsure about a product, call your dealer's service department. They can tell you exactly what's approved for your model year and trim level.
FAQs – Quick Answers to Common Questions
Can I use baby wipes on leather car seats?
Not really. Most baby wipes contain alcohol and other chemicals that dry out the leather. They’re also soaked with liquid that can seep into the foam.
Stick to a dry microfiber cloth for quick wipe-downs. If your seats need more than dusting, follow the methods in our light colored upholstery guide instead.
Is vinegar safe for cleaning leather car seats?
No. Vinegar is acidic and strips the protective coating. It also leaves a smell that lingers.
Never use it on any type of automotive leather. For a complete breakdown of what actually works, check out our safe interior cleaning guide.
How do I remove ink from leather car seats?
Dab a cotton swab with 70% isopropyl alcohol. Test on a hidden spot first. Gently dab the stain, don’t rub.
Wipe away the ink with a clean cloth. Finish with a light conditioning. For other tricky stains, our stain removal techniques page covers more options.
Do I need to condition after cleaning?
Yes, always. Cleaning removes oils along with dirt. Conditioning restores moisture and keeps the leather flexible.
Skip conditioning and you’ll see cracking within months. For detailed steps on post-wash conditioning routines, see our dedicated guide.
Can I use a steam cleaner on leather seats?
Only on coated leather and only with very low pressure. Too much heat and moisture can warp the leather and damage the foam. Steam cleaning is risky for most drivers.
Stick to the manual method unless you’re experienced in professional interior care practices.
How often should I clean leather car seats?
Every 2 to 3 months for a daily driver. Clean more often if you have kids, pets, or live in a hot climate. Lightly dust weekly.
Condition every second clean. Find a seasonal care schedule by climate in our complete maintenance guide.