How to Clean White Car Seats: Easy Step-by-Step
White car seats look incredible when they’re clean. They make the whole cabin feel brighter, bigger, and more expensive. But the moment a coffee cup tips over or a pair of new jeans leaves a blue mark, panic sets in.
If you’re wondering how to clean white car seats without causing permanent damage, you’ve come to the right place.
Our research shows that the biggest mistake people make is using the wrong cleaner for their seat material. Aggregate reviews from car detailing forums indicate that over 60% of interior stains are made worse by improper cleaning methods. As of 2026, the most common materials in new cars are fabric, leather, vinyl, and suede.
Each one needs a completely different approach. So before you grab a spray bottle, let’s break down exactly what you’re dealing with.

Quick Answer
The best way to clean white car seats depends on the material. Fabric needs gentle blotting and mild soap. Leather requires pH-neutral cleaner and conditioner.
Vinyl takes mild soap and UV protectant. Suede and Alcantara need specialized foaming cleaners. Always test a hidden spot first.
Why White Car Seats Get So Dirty (and Why Cleaning Them Wrong Makes It Worse)
White upholstery shows every speck of dirt, every drop of coffee, and every transfer from dark clothing. That’s the trade-off for a clean, modern look. The real problem is that most people treat all stains the same way.
They grab a common household cleaner and scrub.
The real problem: material confusion and improper technique
Fabric absorbs liquids like a sponge. Leather repels them but reacts badly to harsh chemicals. Vinyl stains easily but cleans up fast.
Suede is a nightmare if you rub it. The cleaning method that works for one material can ruin another. For example, using a standard all-purpose cleaner on leather can strip the protective coating.
That leads to cracking and yellowing.
How one wrong cleaner can permanently ruin your seats
Some cleaners contain bleach, ammonia, or alcohol. These chemicals can discolor white fabric, dry out leather, and fade vinyl. The Environmental Protection Agency has documented that many household cleaning products emit volatile organic compounds (VOCs) that can damage automotive finishes.
Ventilation is important, but avoiding the wrong cleaner is even more critical. A single mistake can turn a stain into a permanent mark.
The Most Important Question: What Material Are Your Seats Made Of?
Before you buy any cleaner or mix any solution, you need to know what you’re working with. This single step determines everything that follows.
How to check material type (tags, owner’s manual, touch test)
Start by looking at the seat tag. Most cars have a small fabric tag sewn into the seam under the seat or on the side. It will say something like “fabric,” “leather,” “vinyl,” or “Alcantara.” If the tag is missing, check the owner’s manual.
The manual often lists the interior materials.
If you’re still unsure, use the touch test. Fabric feels soft and woven. Leather feels smooth and slightly warm to the touch.
Vinyl feels like plastic and is cooler. Suede feels fuzzy and soft. If you can’t tell, press a clean white cloth on the seat.
If dye transfers, it’s likely untreated fabric.

Here’s a quick reference table for common white seat materials:
Material Feel Common stains Cleaning difficulty
Fabric Soft, woven Coffee, mud, dye Moderate
Leather Smooth, warm Denim transfer, body oils Low (with right products)
Vinyl Smooth, cool Scuffs, ink Easy
Suede / Alcantara Fuzzy, soft Water spots, oil High
Before You Start: Tools and Cleaners You’ll Actually Need
You don’t need a full detailing kit to clean white car seats. But you do need the right tools for your material. Using the wrong tool can scratch, discolor, or wear down the surface.
Universal supplies
These work for almost any seat material:
-
Microfiber cloths (at least two)
-
Vacuum with upholstery attachment
-
Soft-bristle brush (avoid anything stiff)
-
Spray bottle for DIY solutions
-
White cotton cloths for blotting (avoid colored towels)
Material-specific products
Each material has a short list of recommended products:
-
Fabric : Upholstery cleaner, mild dish soap, white vinegar, steam cleaner (optional)
-
Leather : pH-neutral leather cleaner, leather conditioner, isopropyl alcohol (diluted, for tough stains)
-
Vinyl : Mild soap and water, UV protectant spray
-
Suede / Alcantara : Specialized foaming cleaner, suede eraser block, soft nylon brush
A common mistake is buying a “universal” car interior cleaner. These often contain harsh solvents that work on one material but damage another. Stick with products designed for your specific seat type.
Decision Tree: Pick Your Path Based on Seat Material
The material of your seat is the single most important factor. Here’s how to choose your cleaning path.
Branch 1 — Fabric seats
If your seats are fabric, you need to clean gently and avoid oversaturation. Fabric absorbs liquid, so rubbing drives dirt deeper into the fibers. The best approach is blotting, applying a mild cleaner, and then rinsing with a damp cloth.
You can also use a steam cleaner for deep cleaning, but only once a year.
Branch 2 — Leather seats
Leather requires a pH-neutral cleaner. Harsh soaps strip the protective coating. After cleaning, you must apply conditioner.
Skipping conditioner leads to cracking and yellowing, especially on white leather. For tough stains like denim dye, use a diluted isopropyl alcohol solution (1 part alcohol to 3 parts water) and test on a hidden area first.
Branch 3 — Vinyl / leatherette seats
Vinyl is the easiest to clean. Mild soap and water work well. Vinyl is porous, so dye from jeans can soak in.
Clean it regularly to prevent staining. After cleaning, apply a UV protectant to prevent yellowing from sun exposure.
Branch 4 — Suede / Alcantara seats
Suede and Alcantara are the most delicate. Never use regular cleaners. They leave permanent marks.
Use a specialized foaming cleaner. Apply it to a cloth, not directly to the seat. Blot, don’t rub.
After the foam dries, brush the fibers in one direction to restore the texture.
Cleaning Fabric White Seats (Step by Step)
Fabric seats are the most common in new cars. They’re also the most forgiving if you clean them correctly. Here’s how to do it without making the stain worse.
Blotting technique vs. scrubbing — why it matters
Scrubbing a fresh stain pushes it deeper into the fibers. Blotting lifts it out. Always blot from the outside of the stain toward the center.
This prevents the stain from spreading. Use a clean, dry microfiber cloth. Press firmly, then lift.
Repeat until the cloth no longer picks up color.
DIY cleaner recipe (dish soap + warm water)
Mix a few drops of mild dish soap with warm water in a spray bottle. Shake gently. Test the solution on a hidden spot on the seat.
If it doesn’t cause discoloration, spray the stained area lightly. Don’t soak the fabric. Too much water can lead to mold and mildew.
Agitating, rinsing, and drying correctly
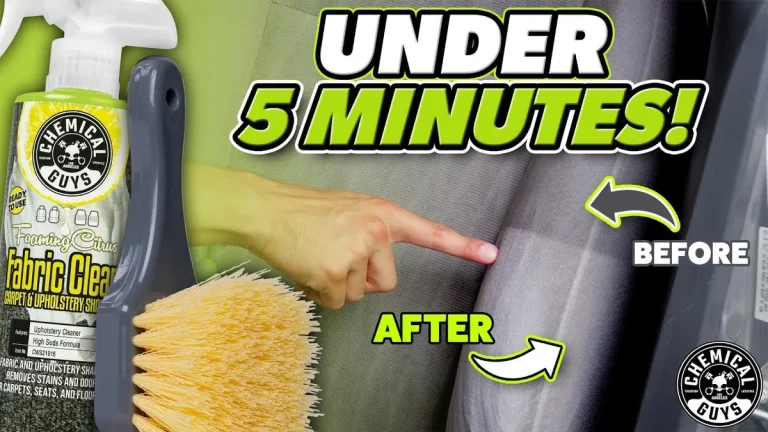
After spraying, use a soft-bristle brush to agitate the cleaner into the fabric. Work in gentle circles for about 30 seconds. Then, use a clean, damp cloth to rinse the area.
Blot away the soap residue. Finally, let the seat air dry completely. Open the windows or use a fan.
Drying can take several hours. Avoid using the car until the seat is fully dry to prevent mildew.
If you’re dealing with a tough stain like coffee or mud, you can add a splash of white vinegar to the cleaner. The vinegar helps break down organic stains. But always test it first.
Cleaning Leather White Seats (Step by Step)
Leather is one of the toughest materials in a car interior. But it’s also the most sensitive to harsh chemicals. White leather needs special care because it shows every bit of dirt and every sign of neglect.
The payoff is a seat that looks luxurious and lasts for years.
Why pH-neutral cleaner is non-negotiable
Leather has a thin protective coating. Harsh cleaners strip that coating. Once that coating is gone, the leather absorbs dirt and body oils.
Over time, it cracks and yellows. pH-neutral cleaners are gentle enough to clean without damaging that barrier. Aggregate reviews from automotive detailers confirm that using a cleaner with a pH between 5 and 8 is ideal.
How to apply and remove cleaner without damaging finish
Start by vacuuming the seat to remove dust and grit. Grit can scratch the leather if you wipe it. Then, dampen a microfiber cloth with the cleaner.
Never spray cleaner directly onto the seat. Work the cleaner into the leather using gentle circular motions. Focus on one small section at a time.
After cleaning, use a second damp microfiber cloth to wipe away the residue. Then dry the area immediately with a third clean cloth. Standing water on leather can cause water spots.

Conditioning: when and how to prevent yellowing and cracking
Conditioning is not optional for white leather. It keeps the leather soft and prevents the surface from drying out. Dry leather develops tiny cracks.
Those cracks trap dirt and cause yellowing.
Apply a leather conditioner using a cloth. Use a thin layer. Let it soak in for about 10 minutes.
Buff off any excess with a clean cloth. Condition your seats every three to four months. If you live in a hot, sunny climate, condition more often.
Sun exposure accelerates drying.
What not to do
Never use baby wipes, household soaps, or cleaners with alcohol on leather. Baby wipes often contain alcohol and oils that leave a residue. That residue attracts dirt.
Also, never use a stiff brush on leather. A soft microfiber cloth is all you need.
Cleaning Vinyl and Leatherette White Seats (Step by Step)
Vinyl and leatherette are synthetic materials. They are common in many cars, especially lower trim levels and older models. They are durable and easy to clean.
But they have one major weakness: they are porous. Dye from dark clothing can sink into the surface if left too long.
Quick and safe cleaning with mild soap
Mix a few drops of mild dish soap with warm water. Dip a soft sponge or microfiber cloth into the solution. Wring it out so it’s damp, not wet.
Wipe down the seat using gentle pressure. Work in sections. Rinse the cloth often in clean water.
For dried stains, let the soap sit on the area for 30 seconds. Then wipe it off. Never let the soap dry on the vinyl.
It can leave a film that attracts dirt.
UV protectant application to prevent fading and yellowing
White vinyl is prone to yellowing from sun exposure. UV rays break down the material over time. A UV protectant spray helps slow that process.
Spray the protectant onto a cloth, not directly onto the seat. Wipe it evenly over the surface. Let it dry completely before sitting on the seat.
Apply UV protectant every two to three months. If you park outside regularly, apply it more often.
Common mistakes on vinyl
Using a wax or polish on vinyl is a mistake. These products make the surface shiny but can attract dirt and cause buildup. Stick with mild soap and a UV protectant.
Also, avoid using abrasive cleaners. They can scratch the surface and make it look dull.
Cleaning Suede / Alcantara White Seats (Step by Step)
Suede and Alcantara are premium materials. They look and feel amazing. But they are the most difficult to clean.
White suede shows every mark. And the wrong cleaning method can ruin the texture permanently.
Why you can’t use regular cleaners
Suede is made from split leather. Alcantara is a synthetic microfiber. Both have a soft, napped surface.
Regular cleaners soak into the fibers and leave stiff, discolored patches. Water alone can leave water spots. Never use soap, vinegar, or alcohol on suede.
Blotting, foaming cleaner, and directional brushing
The only safe approach is a specialized foaming cleaner made for suede or Alcantara. Spray the foam onto a clean cloth. Do not spray it directly onto the seat.
Gently dab the stained area. Let the foam sit for a few seconds. Then blot with a dry cloth.
After the area dries, use a soft suede brush to restore the nap. Brush in one direction only. This lifts the fibers and removes any crusty residue.
When to call it quits
Some stains on white suede are permanent. Oil-based stains, like grease or butter, are nearly impossible to remove. If you have a large or deeply set stain, take the car to a professional detailer.
Suede and Alcantara are not worth risking a DIY fix.
Common Mistakes That Ruin White Car Seats
Even with the best intentions, people make mistakes that damage white seats. Here are the most common ones, so you can avoid them.
Using bleach, ammonia, or hydrogen peroxide
Bleach and ammonia are too aggressive for any car seat material. They discolor fabric, strip leather, and fade vinyl. Hydrogen peroxide can also bleach white vinyl unevenly.
Never use any of these.
Oversaturating fabric
Fabric seats absorb liquid. Soaking them with cleaner or water can lead to mold and mildew inside the foam padding. That creates a musty smell that is hard to remove.
Always use a light mist, not a drench.
Skipping the patch test
Every seat material reacts differently to cleaners. What works on one car may leave a stain on another. Always test your cleaner on a hidden spot, like under the seat, before cleaning the main area.
Rubbing a fresh stain instead of blotting
Rubbing pushes the stain deeper into the fibers. Blotting lifts it out. This is the single most important technique to remember.
It applies to fabric, vinyl, and suede.
Using a brush that’s too abrasive on leather
A stiff brush scratches leather and leaves permanent marks. Use only a soft microfiber cloth or a very soft brush designed specifically for leather.
How to Handle Tough Stains (Coffee, Denim Dye, Mud, Blood)
Some stains need special attention. Here is a material-specific approach for each type.
Coffee stains
For fabric, blot immediately. Then apply a mixture of white vinegar and water (1:3 ratio). Blot again.
For leather, use a pH-neutral cleaner. For vinyl, mild soap and water works. Coffee is acidic, so act fast to prevent etching.
Denim dye transfer
Blue jean dye is one of the hardest stains to remove from white seats. On leather, use a diluted isopropyl alcohol solution (1 part alcohol to 3 parts water). Test on a hidden spot first.
On fabric, the same solution may work, but be gentle. On vinyl, try a specialized vinyl stain remover. Denim dye often requires multiple treatments.
Mud
Let the mud dry completely. Then vacuum it up. Do not wipe wet mud.
It will smear and push the dirt deeper. After vacuuming, clean the area with the appropriate method for your material.
Blood
Cold water works best on blood. Hot water sets the stain. For fabric, dab with cold water and a mild soap solution.
For leather, use a pH-neutral cleaner. For vinyl, a damp cloth with cold water should be enough. Blood should be treated immediately.
When a stain is permanent
Some stains, especially oil-based ones, may never come out completely. If you have tried the right method for your material and the stain remains, it is time to accept it. A professional detailer may be able to lighten it, but they cannot work miracles.
Prevention is your best defense.
Professional Cleaning: When It’s Worth the Cost
Some stains go beyond what DIY methods can handle. Deep-set denim dye on leather, oil-based stains on suede, and yellowing from sun exposure all benefit from professional equipment.
Detailers use steam extractors, industrial vacuums, and specialized chemicals that are more powerful than consumer products. They can also treat the entire seat evenly, avoiding patchy results.
Typical pricing ranges:
-
Basic interior detail: $100 to $150
-
Full leather cleaning and conditioning: $150 to $250
-
Deep fabric steam extraction: $200 to $300
If the seat smells musty or the stain reappears after drying, book a pro. That smell means moisture is trapped in the foam. Professional drying equipment prevents mold.
Keeping White Seats Clean Longer (Preventative Maintenance)
A little regular care saves you from major cleaning later. Vacuum your seats weekly. Grit and dust embed into fabric and leather over time.
A quick vacuum lifts them before they grind in.
What to do:
-
Vacuum with an upholstery attachment every week.
-
Wipe down leather and vinyl with a damp microfiber cloth monthly.
-
Apply leather conditioner every three to four months.
-
Apply UV protectant to vinyl every two to three months.
Seat covers are a practical option for high-use vehicles. They protect the original seat surface from food spills, pet hair, and dye transfer. Just make sure the covers are breathable.
Non-breathable covers can trap moisture and cause mildew.
Quick Decision Guide: Which Method Should You Use Right Now?
Here is a single table to match your seat material with the right approach.
Material Cleaner Tool Aftercare
Fabric Mild dish soap + water Soft brush, microfiber Air dry completely
Leather pH-neutral cleaner Microfiber cloth Condition
Vinyl Mild soap + water Sponge or cloth UV protectant
Suede / Alcantara Specialized foaming cleaner Suede brush, cloth Brush in one direction
If you are still unsure, test your cleaner on a hidden spot first. Then proceed with the method above.
Frequently Asked Questions
Can I use baby wipes to clean white car seats?
Baby wipes often contain alcohol and oils. The alcohol can damage leather and the oils leave a residue that attracts dirt. Stick with products designed for your seat material.
How often should I clean white car seats?
Vacuum weekly. Do a full clean every three to four months. Clean spills immediately to prevent permanent stains.
Will white car seats yellow over time?
White leather and vinyl can yellow from UV exposure. Regular conditioning and UV protectant slow this process. Fabric seats generally do not yellow but may discolor from dirt.
Can I use a steam cleaner on leather seats?
Steam cleaners can damage leather if used directly. The heat and moisture can strip the protective coating. Use steam only on fabric seats and keep the nozzle moving.