What Can I Use to Clean Car Seats?
You grab a spray bottle and you stare at your car seat. Coffee stain, mystery goo, maybe just months of invisible grime. You know you need to clean it, but what can you actually use?
The answer isn't one product. It depends on your seat material, fabric, leather, or vinyl, and the type of stain you're dealing with. Use the wrong cleaner and you risk discoloration, sticky residue, or even mould under the surface.
According to manufacturer care guides from several major automakers, most car interiors use either woven polyester fabric, treated leather, or a vinyl material often called leatherette. Each reacts differently to cleaning agents. Fabric can tolerate water-based cleaners but gets smelly if oversaturated.
Leather needs pH-neutral products and a follow-up conditioner. Vinyl is the most forgiving but still hates bleach and ammonia. We'll walk through the decision tree so you choose the right method the first time.

Quick Answer
What you can use to clean car seats depends on the seat material. Fabric seats work well with a homemade mix or foam cleaner. Leather seats need a dedicated cleaner and conditioner.
Vinyl seats clean up with mild soap. Always test a hidden spot and blot stains, not rub them.
First Decision: Fabric, Leather, or Vinyl?
Image source: Wikimedia Commons / Georgy90 (CC BY-SA)
The very first thing is to figure out what your seats are actually made of. This isn't always obvious. A lot of modern cars use synthetic leather (vinyl, leatherette, or "vegan leather") that looks like the real thing but cleans differently.
How to check:
- Fabric (cloth) seats, They feel like heavy upholstery material. You'll see woven texture, and they absorb liquids quickly. Most are polyester or nylon blends.
- Leather seats, Genuine leather feels supple, has a slight grain texture, and usually breathes. It's more expensive and usually only on higher trims.
- Vinyl / leatherette, It feels smooth, almost plastic-like, and doesn't breathe. It's common in mid-range cars and aftermarket seat covers.
Still unsure? Check your owner's manual. Automakers specify the material and often list approved cleaner types.
If you see "leatherette" or "synthetic leather" in the manual, treat it as vinyl, not real leather.
Once you know the material, the cleaning path splits:
| Seat Material | Safe Cleaner Types | What to Avoid |
|---|---|---|
| Fabric | Water-based cleaners, vinegar mixes, foam cleaners, steam, extraction | Bleach, ammonia, oil-based products |
| Leather | pH-neutral leather cleaner, dedicated leather soap | All-purpose cleaners, vinegar, harsh detergents |
| Vinyl / leatherette | Mild dish soap solution, vinyl-specific cleaner | Bleach, ammonia, abrasive scrubbing |
For real leather, our detailed guide on keeping genuine leather seats supple goes deeper.
Second Decision: Light Maintenance or Deep Stain Removal?
Now that you know the material, ask yourself: is this a quick refresh or a full rescue mission?
Light maintenance, You're just removing dust, crumbs, and light surface dirt. Seats look clean overall. No visible stains or odors.
In this case, a simple vacuum followed by a wipe with a damp microfiber cloth is enough. For fabric, a quick spray of diluted vinegar water works. For leather, a slightly damp cloth, then condition every few months.
Deep stain removal, You've got visible spots, discoloration, sticky residue, or smells (pet urine, smoke, food spills). This calls for a dedicated cleaning product or machine. The deeper the stain, the more aggressive the method you'll need.
Here's the decision tree:
- Fabric, light stain → Homemade mix (vinegar + baking soda + dish soap)
- Fabric, moderate stain → Commercial foam cleaner
- Fabric, heavy stain or pet odor → Extractor or steam cleaner
- Leather, light dirt → pH-neutral leather cleaner
- Leather, set-in stain → Leather cleaner + possible professional help if deep-set
- Vinyl, any dirt → Mild soap solution or vinyl cleaner
For Fabric Seats: When to Use a Homemade Mix (Vinegar, Baking Soda, Dish Soap)
Homemade solutions are cheap, non-toxic, and work great for routine fabric seat cleaning or light stains like coffee or soda.
The recipe: Mix 1 cup white vinegar, 1 tablespoon baking soda, 1 teaspoon mild dish soap (like Dawn), and 2 cups warm water. Put it in a spray bottle.
How to use:
- Spray the stained area lightly, don't soak it.
- Let it sit for 2, 3 minutes.
- Blot with a clean microfiber cloth. Never rub, that drives the stain deeper.
- Vacuum up any excess moisture with a wet/dry vac if you have one, or blot until nearly dry.
- Let the seat air dry with windows open or a fan running. Oversaturation is the biggest mistake; it can lead to mildew.
Pros: Cheap, safe, no harsh chemicals. Effective on most food and drink stains.
Cons: Won't lift heavy, set-in stains or pet biological odors. Needs a bit of elbow grease.
When to skip it: If you're dealing with a large urine stain or deep grease, the homemade mix may not have enough surfactant power. In those cases, move to a stronger option.
For a more complete guide on handling specific fabric stains, check out our cloth seat stain removal walkthrough.
For Fabric Seats: When to Use a Commercial Foam Cleaner
Foam cleaners are aerosol cans that dispense a thick, foamy cleaner. They're designed for fabric upholstery and are the most popular off-the-shelf option.
How they work: The foam sits on top of the fabric instead of soaking in. You spray it, let it dwell for a minute, then agitate gently with a soft brush. The foam lifts dirt to the surface.
Then you wipe it away.
When to choose foam cleaner:
- Moderate stains that the homemade mix didn't fully remove.
- You want a product with built-in deodorisers or stain fighters.
- You're cleaning a whole seat as a refresh, not just a spot.
- You don't have a carpet extractor or steam cleaner.
What to look for:
- pH-neutral formula (check the label).
- No bleach or ammonia.
- "No residue" or "rinse-free" so you don't have to hose the seat.
Limitations: Foam cleaners handle surface-level dirt well, but they don't extract dirt from deep in the fabric fibers. If you have ground-in grime from years of use, you'll need extraction or steam.
For Fabric Seats: When to Use an Extractor or Steam Cleaner
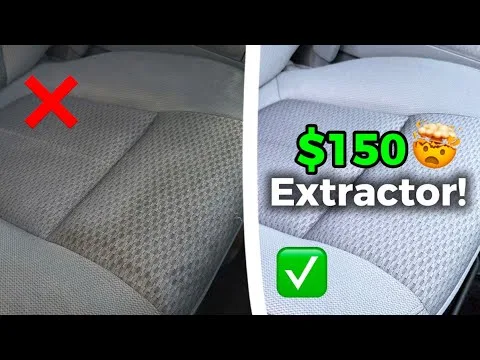
Extractors (also called carpet cleaners) spray a cleaning solution into the fabric and simultaneously vacuum it out with strong suction. They're the gold standard for deep fabric seat cleaning. Steam cleaners inject hot water and steam, then extract the dirty water.
Use these when:
- Heavy, set-in stains that haven't come out with foam or DIY methods.
- Pet accidents (urine, vomit, drool). The solution gets into the foam padding where smells hide.
- You're selling the car and want the interior to look and smell like new.
- You've got mold or musty odors from previous oversaturation.
What you'll need: If you don't own an extractor, you can rent one from most grocery stores or hardware stores for around $20, 30 per day. Handheld extractors cost $50, 100 and are worth it if you tackle this regularly.
How to use it:
- Vacuum loose dirt first.
- Pre-treat stains with the machine's cleaning solution or a stain pre-spray.
- Go over each seat section slowly, fast passes won't extract enough.
- Multiple passes until the water runs clear.
- Open the doors and run a fan. Full drying takes 4, 8 hours.
Warning: Steam can set protein-based stains (blood, milk, egg) if the fabric gets too hot. Check the manual's temperature setting. Also, don't oversaturate the seat foam.
If the water pools, vacuum it immediately.
The trade-off: It's more work and more equipment, but the results are night and day. For a truly deep clean an extractor or steam cleaner is the only way to restore fabric seats to near-new condition.
We've inserted the image for the extractor section above. Now moving to the remaining TOC sections.
For Leather Seats: Cleaner First or Conditioner First?
Always cleaner first. Every time.
Some people think a "conditioning cleaner" does both jobs in one step. It doesn't. All-in-one products usually do a mediocre job at cleaning and a worse job at conditioning.
You want two separate steps for real leather.
The order matters because:
- Cleaner removes dirt, body oils, and any previous product buildup.
- Conditioner only works on clean leather. If you apply it over dirt, you're just sealing grime into the surface.
- Conditioner restores oils that cleaning can strip out. Without it, real leather dries out and cracks over time.
Aggregate reviews from detailing communities confirm that skipping the conditioner step is the number one cause of premature leather cracking in cars less than five years old. The leather loses its flexibility, and once cracks form, there's no reversing them.
What not to use on leather:
- Vinegar or lemon juice (too acidic, strips the top coating)
- Dish soap (too harsh, dries out the leather)
- All-purpose household cleaners (they often contain bleach or ammonia)
- Saddle soap (designed for thick work boots, not automotive leather)
Stick with a dedicated leather cleaner that's pH neutral, typically 5.5 to 7 on the scale. Brands like Lexol and Leather Honey have been around for decades because their formulas respect the material. For a complete breakdown of products and technique, our guide on safe leather seat cleaning at home walks through every step.
For Leather Seats: The Gentle Cleaning Method That Won't Crack Them
Here's the process that certified detailers use. It's simple but requires patience.
Step 1, Vacuum first. Loose dirt and grit act like sandpaper when you wipe. Vacuum all crevices with a soft brush attachment.
Step 2, Mix the cleaner. Use a dedicated leather cleaner at the dilution ratio on the bottle. Many are ready-to-use.
Step 3, Apply with a microfiber cloth. Spray the cloth, not the seat. Rubbing the cleaner directly into the leather lets you control how much goes on. Damp, not dripping.
Step 4, Wipe in gentle circles. No aggressive scrubbing. The goal is to lift dirt from the surface and the grain, not to abrade it. Use a soft-bristled detailing brush for seams and perforated areas.
Step 5, Wipe away residue. Use a clean, dry microfiber cloth to remove any excess cleaner before it dries.
Step 6, Let it dry completely. About 15, 20 minutes. The leather should feel dry to the touch, not damp.
Step 7, Apply conditioner. Use a separate microfiber. Apply a thin, even coat. Let it soak in for 10, 15 minutes, then buff off any excess.
If you see the leather darkening during cleaning, that's normal, it means the material is absorbing moisture. It should lighten back as it dries.
How often: Clean and condition leather seats every three to six months. If your car sits in direct sun a lot, lean toward the three-month schedule. UV rays accelerate drying and fading.
When to skip DIY: If the leather has existing cracks, peeling, or the top coating is wearing off, a professional detailer or auto upholstery shop is the safer choice. Harsh cleaning on damaged leather can make things worse fast.
How to Tackle Specific Stains (Coffee, Pet Urine, Mud, Grease, Ink)
Different stains need different chemistry. Here's what works for the most common offenders.
| Stain Type | Best Method | Notes |
|---|---|---|
| Coffee / Soda | Homemade mix (vinegar + dish soap) or foam cleaner | Blot immediately. Don't rub. |
| Pet urine | Enzyme cleaner (buy at pet store) | Regular cleaners won't break down uric acid. Heat sets the smell. |
| Mud | Let dry completely, then vacuum, then foam cleaner | Never rub wet mud into the fabric. |
| Grease / Oil | Dish soap (a few drops) on a damp cloth | Water alone won't lift grease. |
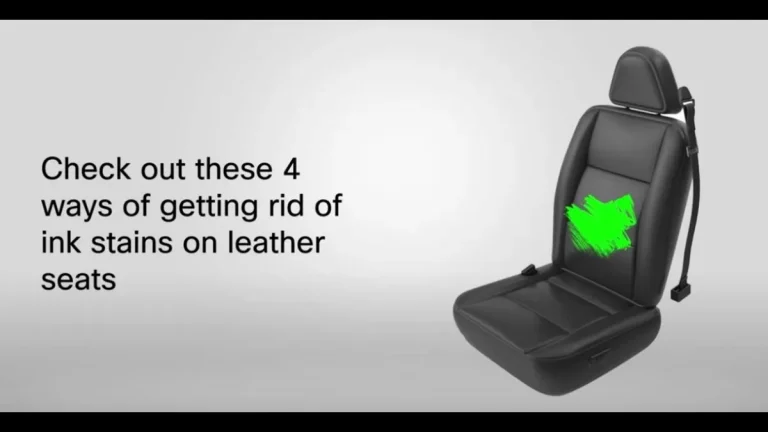
| Ink | Rubbing alcohol on a cotton swab | Test on hidden area first. Blot, don't rub. |
| Blood | Cold water only. Hydrogen peroxide for stubborn spots | Hot water sets blood permanently. |
| Vomit | Enzyme cleaner or white vinegar solution | Strip seat if possible. Extract deeply. |
For fabric seats and pet urine: Enzyme cleaners are the only reliable solution. They contain live bacteria that digest the uric acid crystals. Spray generously, let it dwell for 10, 15 minutes, then blot.
Follow with an extractor if you have one, or just blot well and let air dry.
For leather and ink stains: This is tough. Ink can absorb into the leather's top coating. Try rubbing alcohol on a cotton swab first.
If that doesn't lift it, you may need a professional. Ink is one of the few stains where DIY often fails on leather.
For set-in coffee stains on fabric: Make a paste of baking soda and water. Apply it to the stain and let it sit for 30 minutes. Vacuum it up.
The baking soda absorbs the stain over time. It won't work instantly, but it's chemical-free and safe.
6 Mistakes That Set Stains Permanently or Damage Upholstery
These are the errors we see most often in user reviews and detailing forums. Avoid them and your seats will look good for years.
1. Rubbing instead of blotting. Rubbing grinds the stain deeper into the fibers. Always blot with a clean cloth, working from the outside of the stain inward.
2. Using too much water or cleaner. Oversaturation soaks into the foam padding underneath the fabric. It takes days to dry fully, and damp foam grows mould and mildew.
Less is more.
3. Skipping the spot test. Every cleaner can react differently depending on the dye and material in your specific car. Test on a hidden area, under the seat or behind a panel, before hitting the visible surface.
4. Using bleach or ammonia. These chemicals break down fabric fibers and strip the protective coating off leather. They also leave residue that attracts more dirt.
Never use them on any car seat.
5. Applying heat to protein stains. Blood, milk, egg, and urine contain proteins that cook and bond to fibers when exposed to heat. That means hot water, steam cleaners, and hair dryers are off-limits for these stains.
Always use cold water.
6. Letting leather air dry without conditioner. Leather loses natural oils when wet. If you clean it and walk away, the leather can dry out and crack within weeks.
Always follow up with conditioner.
The Exact Tools and Supplies to Keep in Your Car
You don't need a full detailing kit daily, but having a few basics in the trunk means you can handle spills immediately.
Keep in your car:
- Microfiber cloths (three to five, clean)
- Small spray bottle with diluted vinegar and water (2:1 water to vinegar)
- Soft-bristled brush (an old toothbrush works)
- Small vacuum cleaner or handheld with crevice tool
Keep at home for deeper cleans:
- Upholstery foam cleaner (for fabric seats)
- pH-neutral leather cleaner and conditioner
- Enzyme cleaner (for pet owners)
- Carpet extractor or steam cleaner (for annual deep cleans)
- Baking soda (for odor absorption and stain paste)
A note on microfiber cloths: Use different colors for different tasks. One for vacuum dust, one for cleaning solution, one for drying. Cross-contamination is a real thing, wiping cleaner onto a dirty cloth just moves grime around.
Your Quick Decision Flowchart (Cheat Sheet)
If you're in a hurry, here's the decision tree in a nutshell.
- Identify material. Fabric? Leather? Vinyl?
- Assess stain. Light dirt? Heavy stain? Odor?
- Choose method. Light + fabric = DIY mix. Heavy + fabric = foam or extractor. Light + leather = leather cleaner. Etc.
- Spot test. Always.
- Blot, don't rub.
- Dry fully. Open windows, use fan.
- Condition leather. Never skip this step.
- Repeat if needed. Stubborn stains may need two or three passes.
For those with light-colored fabric seats, we have a dedicated approach for keeping white or light upholstery clean. Lighter colors show dirt faster and need more frequent maintenance.
When to Skip DIY and Call a Professional Detailer
Sometimes the smartest move is to admit the stain is beyond your tools.
Signs you should call a pro:
- The stain has been there for months and you've tried multiple methods.
- The seat smells musty even after cleaning. That means moisture is trapped in the foam.
- Leather has visible cracks, peeling, or the coating is worn away.
- You're dealing with a large area, like a full back seat soaked in pet urine.
- The car is a lease or you're selling it and want maximum resale value.
A professional detailer has commercial-grade extractors, hot water injection systems, and stain-specific chemicals that aren't available to consumers. A full interior detail typically costs $100, $250 depending on your location and vehicle size. For a single stubborn stain, many shops charge $30, $50.
When it's worth the money: If professional cleaning can restore the interior's condition and add $500, 1000 to your car's resale value, it's a no-brainer. Especially before selling or trading in.
Frequently Asked Questions
Can I use dish soap to clean my car seats?
Dish soap works on fabric seats in small amounts, diluted heavily in water. Use it only for grease or oil stains. Never use it on leather, it strips the natural oils and can cause cracking.
Rinse thoroughly with a damp cloth afterward.
What's the safest homemade cleaner for car seats?
A mix of equal parts white vinegar and water, plus a drop of mild dish soap. It's pH neutral enough for most materials. Test it on a hidden spot first.
Don't use it on leather, only fabric or vinyl.
Can I use a steam cleaner on leather seats?
No. Heat and moisture damage real leather's top coating. Steam cleaners are fine for fabric seats but keep them away from leather.
If you need to clean leather, use a dedicated cleaner and conditioner.
How do I get the smell of vomit out of car seats?
Use an enzyme cleaner designed for biological stains. Spray generously, let it dwell for 10, 15 minutes, then blot. Air dry with windows open.
If the smell persists, the liquid likely soaked into the foam padding. An extractor or professional detail may be needed.
How often should I clean my car seats?
Fabric seats need a light vacuum and wipe every month, with a deep clean every six months. Leather needs cleaning and conditioning every three to six months. More often if you have kids, pets, or eat in the car.
Can I use baby wipes on car seats?
Baby wipes are fine for a quick surface clean on vinyl or leather, but they contain moisturizers that leave a residue on fabric. They also won't remove deep stains. Use them only for light touch-ups and always follow leather with conditioner.
How to Keep Car Seats Clean Between Deep Cleans
Light maintenance stops grime from building up into stubborn stains. A weekly vacuum with a crevice tool keeps debris out of the seams. Follow it with a quick wipedown using a damp microfiber cloth.
When to Replace Seat Covers Instead of Cleaning
If your fabric seats have rips, fraying edges, or stains that refuse to lift after three attempts, replacement is often the smarter call. New universal seat covers cost $20 to $60 per row. Professional cleaning of damaged fabric rarely restores the original look.
Understanding pH Levels in Car Seat Cleaners
Most car upholstery materials are pH neutral. Cleaners with a pH above 10 or below 4 can discolor the fabric or strip protective coatings. Aim for products labeled pH neutral, which sit in the 5.5 to 7.5 range.
Why You Should Always Test in a Hidden Spot
Even mild cleaners can react unpredictably with dyes, stains, or factory-applied coatings. Spray a small amount on the underside of the seat or a bottom panel. Wait five minutes, then check for any color change or residue.
How Long Does a Full Interior Detail Take?
A basic clean of all seats takes 30 to 60 minutes. A deep clean using extraction or steam takes two to three hours depending on vehicle size. Always factor in drying time before you plan to use the car again.
For Vinyl Seats: The Easiest Material to Clean
Vinyl or leatherette seats clean up with just mild dish soap and water. Mix a few drops into a spray bottle and wipe down. No conditioner needed.
Avoid bleach and ammonia.
What to Do with Removable Seat Covers
If your seats have removable covers, unzip them and check the tag. Most machine-wash on cold with mild detergent. Air dry only.
Heat can shrink or warp the fabric.
How to Dry Seats Properly After Any Cleaning
Always dry seats fully within a few hours. Roll down the windows or park in direct sun with doors cracked. Use a fan aimed at the seats for faster drying.
Trapped moisture causes mildew.
When to Use a Professional Grade Cleaner
Professional grade cleaners contain stronger surfactants and solvents. They work on heavy oxidation or set-in stains that consumer products can't touch. Use them only if DIY methods have already failed on fabric or vinyl.
Best Routine for Monthly Maintenance
Vacuum once a week. Wipe spills immediately. Do a full deep clean every six months.
That schedule prevents most stains from becoming permanent. It also keeps odors from building up in the padding.