Everything About How to Fix a Hole in a Leather Car Seat
That hole in your leather seat is ugly, but it's not the end of the world. Learning how to fix a hole in a leather car seat takes about 30 minutes of active work, some basic tools, and the patience to let things cure. Ignoring it, though, turns a small problem into a full reupholstery job.
As of 2026, a solid DIY leather repair kit runs $15 to $50. A professional repair costs $80 to $200 per hole. Full seat replacement starts around $300.
The gap between those numbers is why understanding the right repair method matters so much. Let's look at your damage and match it to the fix.

Image source: Bing (Web (fair-use with source credit))
Why a Small Leather Seat Hole Turns Into a Big Problem
Leather seats don't just wear out on their own. Most holes start small, from a key scratch, a pet claw, or a dropped cigarette. What happens next is the real issue.
The hole creates a weak point, and every time you slide in and out of the seat, that weak point gets stressed. Edges fray. The tear grows.
Dirt and moisture work their way into the foam underneath.
That moisture is the silent killer. Once it soaks into the seat padding, it breaks down the foam structure. You end up with a seat that looks sunken and feels hard, even if the leather surface is repaired perfectly.
Catching the hole early and sealing it protects the padding underneath.
There's also the resale angle. A car with a ripped driver's seat loses hundreds of dollars in trade-in value. Interior condition is one of the first things buyers notice.
Fixing a hole now costs less than fixing a sagging, water-damaged seat later. It also keeps your interior looking cared for, which matters if you're planning to sell.
The good news is that most holes are fixable at home. You just need to match the repair technique to the type of damage, the depth, and the kind of leather you're working with.
Quick Answer: What Kind of Hole Do You Have?
The fix depends on the hole type. Clean the area first. Trim loose edges.
Fill tears with compound or glue. Use backing cloth for full penetration holes. Sand, color, and seal.
Full cure takes 4 to 8 hours. Most small holes take under 30 minutes.
How to Diagnose the Damage: Tear, Burn, Puncture, or Seam Split
Before you buy anything, look at the damage closely. The repair method changes based on what you're dealing with. If you skip this step, you'll waste money on the wrong products and end up with a repair that peels or cracks.
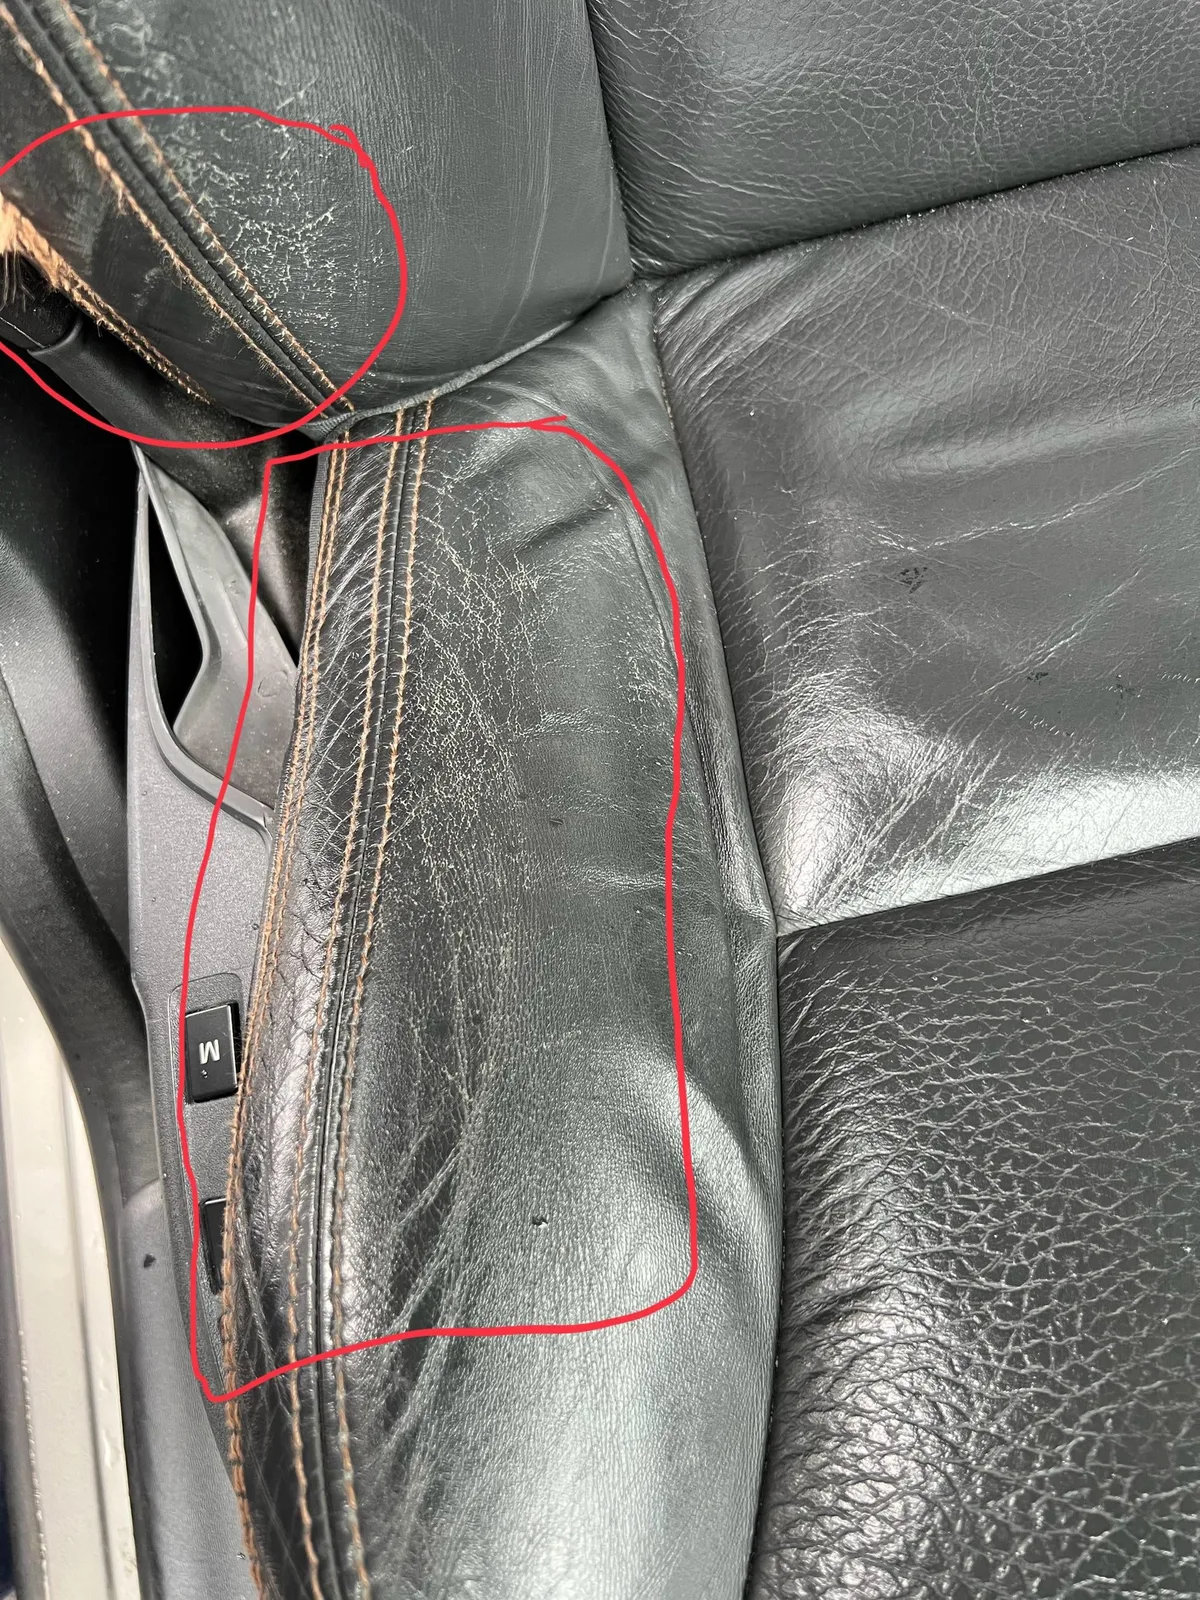
Image source: Bing (Web (fair-use with source credit))
Assessing the Hole: Size, Depth, and Location
Grab a flashlight and look at the hole from a few angles. You're checking three things: size, depth, and edge condition.
- Size: A hole under 1/4 inch is a filler-only job. Anything larger needs a backing patch to give the filler something to grab onto.
- Depth: Is the foam exposed? If you can see yellow padding or stuffing, the tear goes all the way through the leather. That means you need a backing cloth and adhesive, not just filler.
- Edge condition: Are the edges clean, or are there loose fibers and peeling layers? Frayed edges need to be trimmed before you apply anything. Dirty edges need to be cleaned and degreased.
Location matters too. Holes on the outer bolster, where you slide across every time you get in, get more stress. That area needs a flexible repair compound, not a brittle one.
Holes on the flat seat surface are easier because they don't bend as much. Seam splits, where the stitching has torn apart, need to be pulled together and glued from underneath, not just filled on top.
Understanding Your Seat Leather: Smooth, Perforated, Aniline, or Faux
Not all leather is the same. Your repair products need to match the material.
- Smooth coated leather is the most common in modern cars. It has a protective surface layer, which makes it forgiving to repair and easy to recolor.
- Perforated leather has tiny holes for ventilation. Repairing a hole in the middle of a perforated section is tricky. You need to fill the damage first, then recreate the perforation pattern with a special pad or needle tool.
- Aniline leather is dyed all the way through and has no protective topcoat. It's found in luxury vehicles. Repairs are more visible because there's no surface layer to blend into.
- Faux leather or bonded leather doesn't behave like real hide. It has a foam or fabric backing that doesn't take standard leather filler well. In many cases, a patch or replacement panel is the better route.
If you're not sure which type you have, test a hidden area, like the bottom edge of the seat. This works best if it's smooth or coated. Check whether the material has a distinct top layer.
If it peels, it's bonded leather. If it feels porous and absorbs moisture evenly, it's likely aniline.
What You’ll Need: Leather Repair Kit Essentials and Pro Tools
A proper repair kit covers most of what you need. But there's no escaping the prep work. Here's what to gather before you start.
| Category | Item | Purpose |
|---|---|---|
| Cleaning | Leather cleaner, rubbing alcohol, microfiber cloth | Removes oils and dirt so adhesives bond |
| Prep | Fine sandpaper (320-400 grit), scissors | Smooths edges, trims loose fibers |
| Structure | Backing cloth or repair patch, flexible adhesive | Bridges large holes and supports filler |
| Filling | Leather filler compound, plastic spreaders | Levels the hole and rebuilds the surface |
| Texturing | Grain paper or texture pad | Recreates the leather pattern |
| Color | Leather colorant, small sponge or airbrush | Matches the seat finish |
| Protection | Leather sealer or topcoat | Seals the repair and resists wear |
| Curing | Hairdryer or heat gun | Speeds up drying between layers |
Brand quality varies. In our research, consistent user satisfaction shows up when the kit includes a flexible filler specifically labeled for auto interiors. Rigid fillers crack when the seat flexes.
If the kit doesn't say "flexible" or "for leather repair," it's probably for wood or plastic. That's the wrong tool.
The Step-by-Step Workflow for a Permanent Leather Seat Repair
Here's a brief overview of the process. Each step builds on the last. Never skip ahead.
| Step | Action | Drying Time |
|---|---|---|
| 1 | Clean and degrease the area | 10 minutes |
| 2 | Trim loose edges, sand lightly | 5 minutes |
| 3 | Cut and apply backing patch (deep holes) | 10 minutes |
| 4 | Apply filler in thin layers | 15-30 minutes per layer |
| 5 | Sand filler flush | 5 minutes |
| 6 | Recreate grain texture | 2 minutes |
| 7 | Apply colorant in coats | 10 minutes between coats |
| 8 | Seal with topcoat | 30 minutes |
| 9 | Full cure before use | 4-8 hours |
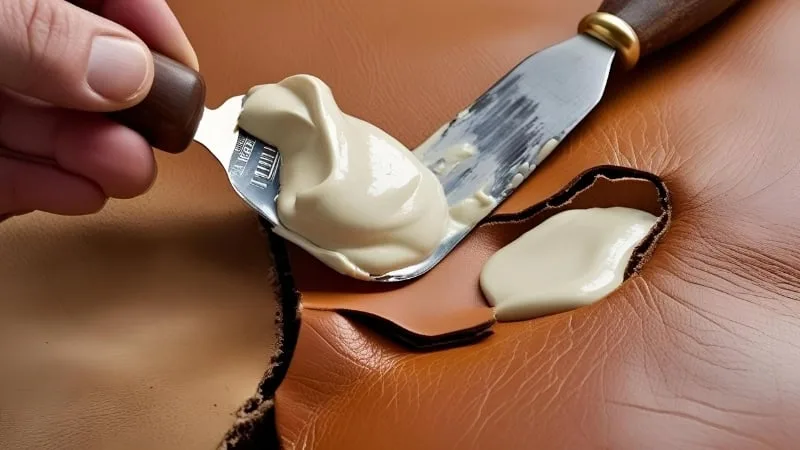
Image source: Bing (Web (fair-use with source credit))
First, clean the area. Use a dedicated leather cleaner to break down body oils and any silicone-based dressing. Wipe it off, then go over the spot with rubbing alcohol on a soft cloth.
That strips away the last of the grease. If filler or adhesive touches an oily surface, it won't bond. This is the most common reason repairs fail.
Next, trim any loose threads or lifted edges with small scissors. Pulling them off can tear more leather. Cut them flush instead.
Lightly sand around the hole with 320 to 400 grit paper. This gives the filler a rough surface to grip. Don't overdo it.
You just want to scuff the surrounding leather, not wear through it.
For holes bigger than 1/4 inch, cut a backing patch slightly larger than the hole. Slide it underneath through the tear and press it in place. Apply a thin layer of flexible adhesive around the patch edges.
This holds it to the underside of the leather and creates a stable base for the filler. Your goal is to give the filler something to sit on, not to create a hard lump.
Now mix the filler if it needs it. Many compounds come ready to use, but some require a hardener. Follow the manufacturer spec for the ratio.
Mix only what you need. Apply the filler into the hole with a plastic spreader, pressing it down firmly to eliminate air pockets. Build it up in thin layers, letting each layer dry before adding the next.
Thick layers shrink as they cure, and shrinkage means a concave dip that you can't sand out.
Once the filler is flush and fully dry, sand it smooth with 400 grit paper. Use light, even passes so you don't sand the surrounding leather. At this point the repair should feel smooth and level.
Pat yourself down. You're past the hard part.
Recreate the grain with the grain paper. Place the paper over the filler and press with a warm iron. The heat and pressure transfer the pattern.
Test on a hidden area first so you don't permanently flatten the seat texture.
Then comes color matching. Apply the dye in light, thin coats. Let each coat dry completely before the next.
Two or three coats usually covers well. Work the color slightly beyond the repair area so it blends into the original leather instead of showing a hard edge.
Finish with a leather sealer or topcoat. This protects the color, adds a bit of sheen, and helps the repaired area resist abrasion. Let everything cure for 4 to 8 hours before sitting on it.
Manufacturer specifications typically recommend full cure before use. If the repair gets heavy use too early, it can leave impressions or shift the filler.
Choosing the Right Repair Route: DIY Kit vs. Professional Upholstery Shop
If the hole is smaller than a quarter and the leather is smooth-coated, DIY works. If the damage crosses an airbag seam or the foam underneath is torn, call a pro. It really is that simple.
A DIY kit handles most small tears, cigarette burns, and pet claw punctures. The repair is nearly invisible when you follow the layering process correctly. The catch is patience.
You have to wait for filler to cure, sand gently, and blend color carefully.
A professional shop becomes the better call when the damage is large, the seat is aniline leather, or you're dealing with perforated leather. Pros use airbrushes to blend color across an entire panel. They also source OEM materials that never show up in consumer kits.
If your car has premium upholstery and a complex interior, the risk of a visible home repair climbs fast. Dealerships often outsource interior work to specialized shops. That's a strong signal you should too.
Leather Repair Costs: DIY vs. Pro vs. Replacing the Seat
DIY costs $15 to $50 in materials. A pro charges $80 to $200 per hole. Replacing the entire seat cover runs $300 to $800.
A basic kit covers filler, colorant, and grain paper. The premium kits add flexible adhesive, backing cloth, and a small heat tool for faster curing. If you don't own rubbing alcohol or fine sandpaper, add about $10 to your total.
Professional pricing depends on the shop and the vehicle. Independent detailers tend to undercut dealerships. Aggregate reviews of repair shops report that most single-hole quotes land between $100 and $150.
Reupholstering is the expensive route, but sometimes it's the only correct one. You can save money by removing the seat yourself and handling the disassembly. The cover itself is only part of the price.
Labor drives the rest.
| Option | Typical Cost | Notes |
|---|---|---|
| DIY kit | $15 to $50 | Includes filler, dye, basic tools |
| Professional repair | $80 to $200 per hole | Includes color blending and texture matching |
| Full reupholstery | $300 to $800 per seat | Includes new cover material and labor |
Mistakes That Ruin Leather Repairs (and How to Avoid Them)
Nine times out of ten, a failed repair comes down to prep, not product. The biggest mistake is skipping the cleaning step. Body oils and silicone dressings sit on the leather and block adhesion.
Even if the seat looks clean, wipe it with rubbing alcohol.
Applying filler too thick is the second most common failure. One thick glob shrinks as it cures, leaving a concave dip. Two thin layers cure flat and sand smooth.
If the filler stays tacky after several hours, you used the wrong mix or a non-flexible compound.
Sanding too aggressively makes the third mistake. Heavy sandpaper leaves a shiny, smooth patch that won't absorb dye evenly. Stick with 320 to 400 grit and use light pressure.
Some owners apply a proper leather conditioner before the repair, then wonder why nothing sticks. Conditioners are for after the work is done. They leave behind oils that block the filler bond.
Never pull a tear apart to "see underneath." That just widens the cut. Trim loose edges and press them together before filling.
Safety Warnings: Airbags, Heated Seats, and Product Handling
If your hole sits on or near a side airbag seam, stop and call a professional. Many modern seats have airbag modules stitched into the outer bolsters. Covering that seam with thick filler can restrict deployment.
That's a genuine safety risk, not just a cosmetic concern.
Heated seats add another layer of caution. Sanding deep enough to reach the heating element can short the seat's electrical system. Heat guns used for grain transfer can also damage wiring beneath the leather.
Keep heat low and application brief.
Adhesives and fillers release solvent vapors. Work in a well-ventilated garage or outdoors. Most are flammable, so keep them far from open flames.
If kids ride in the back, remember that a fresh repair is slick until the topcoat cures. For guidance on keeping children properly secured, review the rear seating positions guidance and the National Highway Traffic Safety Administration's airbag safety information.
Expert Tips for a Factory-Like Finish on Bolster Wear and Burn Holes
The difference between "good enough" and "factory" comes down to layering, texture, and blending. For bolster wear, the leather is often compressed, not just torn. Build the area back slightly above the surrounding surface before sanding flush.
This accounts for how much the seat flexes.
For burn holes, the melted edge is hard and waxy. Trim it away with a sharp blade so the filler grips fresh material. If your kit includes a flexible primer, use it.
It helps the colorant bond to the repaired patch.
Always test the color on a hidden area first. Use a small artist's brush for tight edges, then a sponge or airbrush for the wider area. Two or three light coats dry faster and look more natural than one heavy coat.
Grain paper with a warm iron works best on flat panels. For curved bolsters, use a heat gun and press the pattern pad by hand. Hold it steady for a few seconds, then peel slowly.
Finish with a topcoat that matches the seat's sheen. Matte seats need a matte sealer. Glossy seats need a satin or gloss finish.
Once cured, protect the area with a quality car seat leather conditioner that doesn't leave a greasy film.
Common Leather Seat Repair Scenarios by Vehicle Type and Climate
Trucks and SUVs see heavy-duty damage. Pet claws, cargo straps, and dropped tools leave deep punctures that need backing cloth. Luxury sedans with aniline leather need professional color blending because the dye soaks through the hide.
Family cars with booster seats deal with compression marks and spilled drinks.
| Vehicle Type | Common Damage | Best Approach |
|---|---|---|
| Truck / SUV | Tool punctures, pet claws | Backing patch plus flexible filler |
| Luxury sedan | Aniline leather wear, sun fading | Professional color matching |
| Family car | Booster seat compression, stains | Gentle sanding, flexible filler, topcoat |
Climate plays a role in how the leather ages. Hot regions cause UV damage that cracks the topcoat, so add an extra sealer coat. Cold climates make leather brittle, which means flexible filler is essential to prevent re-cracking.
Humid regions let moisture reach the foam, so dry the area fully before sealing.
FAQs About Fixing Holes in Leather Car Seats
How long does a leather seat repair take?
Active work takes 15 to 30 minutes for a small hole. Full cure needs 4 to 8 hours before you sit on the seat. The filler drying time between layers is the real bottleneck.
Can I repair a hole near a side airbag?
No. Never repair over or near an airbag seam. Heavy filler can restrict deployment.
Take it to a professional upholstery shop that understands airbag safety systems.
How do I match the leather color?
Use the vehicle's interior color code when available. Test the dye on a hidden area first. Apply two or three light coats for the most even blend.
What if my leather is perforated?
Perforated leather is harder to repair invisibly. Fill the hole, then use a texture pad to recreate the vent hole pattern. Some owners accept a small smooth patch instead.
Your Decision Guide: Which Repair Method Should You Pick?
- Hole under 1/4 inch, clean edges, smooth leather: Use a DIY kit. Clean, fill, sand, color, seal.
- Hole larger than 1/4 inch with exposed foam: Add a backing cloth and flexible adhesive before filler.
- Damage on the outer bolster: Reinforce with backing cloth, use flexible filler, and blend color carefully.
- Airbag seam, aniline leather, or heated seat wiring: Call a professional. The risk isn't worth the savings.
- Multiple holes or a cracked, brittle panel: Consider full reupholstery. Patch repairs won't hold long on failing leather.
Most holes are fixable at home if you follow the layering process exactly. Prep well, cure fully, and protect the repair with conditioner. Your seat will look better, hold up under daily use, and keep your car's interior value intact.