What Is How to Fix Car Leather Seat Tear
Most car owners don't notice a leather seat tear until it's too late. If you're wondering how to fix car leather seat tear, the good news is that most damage is repairable at home. A small snag from a key, a pet claw, or a car seat base can turn into a gaping split in just a few weeks.
The real fix starts with knowing exactly what kind of tear you're dealing with.
Leather seat repairs have a surprisingly narrow window where DIY makes sense. Aggregate repair-shop pricing as of 2026 puts a professional tear repair at $100 to $200 per seat, while a complete DIY kit costs $20 to $50. That gap is why thousands of owners try it themselves.
The trick is matching the repair method to the tear's size, depth, and location.
The Real Problem: Why Most Leather Seat Tears Get Worse

Most car interiors are not made of pure, raw hide. They use coated or pigmented leather with a polymer topcoat that carries the color. When that topcoat splits, the damage exposes the softer leather fibres underneath.
Every time you slide into the driver's seat, the torn edge flexes and catches. Over weeks, the tear can grow from a barely visible pinprick to a 6 cm gash. Moisture and body oil accelerate the problem by softening the material around the damage.
This is why early diagnosis matters more than any single repair product. A small break in the topcoat is cosmetic. A full-thickness tear is structural.
Different damage needs a different approach.
Quick Answer: Which Repair Method Should You Use?
Small tears under 1 cm need filler and colorant. Medium tears from 1 to 5 cm need a backing patch and filler. Large tears over 5 cm usually need a professional.
Match the repair to tear size, depth, and seat material.
First, Know Your Seat: Real Leather vs. Vinyl vs. Bonded Leather
Before you buy any repair kit, find out what your seat is actually made of. Car manufacturers use the word "leather" loosely. The repair process depends on which material you're working with.
Most factory leather seats are coated or pigmented leather. That's a real leather hide, sanded smooth, sealed with a polyurethane topcoat, and embossed with a grain pattern. The topcoat is what carries the color and shine, and it's the layer that cracks or tears first.
Vinyl or leatherette seats look similar but are entirely synthetic. Bonded leather is a layer of shredded leather fibres glued onto a backing. Both need different adhesives and fillers than genuine leather.
| Material | Common look | Repair approach |
|---|---|---|
| Aniline / semi-aniline leather | Natural grain, absorbs moisture | Flexible leather filler and dye |
| Coated / pigmented leather | Uniform grain, sealed topcoat | Filler, colorant, topcoat (most common) |
| Vinyl / leatherette | Smooth or embossed, no real hide | Vinyl repair compound, not leather filler |
| Bonded leather | Thin top layer over backing | Often needs replacement; patches don't hold |
A simple water test helps. Put a drop of water on a hidden spot. Genuine coated leather darkens slightly.
Vinyl and bonded leather let it bead up and sit there.
If you're still unsure, check your owner's manual or the material tag under the cushion. And once you've figured out the base material, you can plan the repair. For keeping the surface healthy afterward, a quality leather conditioner makes a bigger difference than most people expect.
Tear Anatomy: Size, Depth, and Location Matter
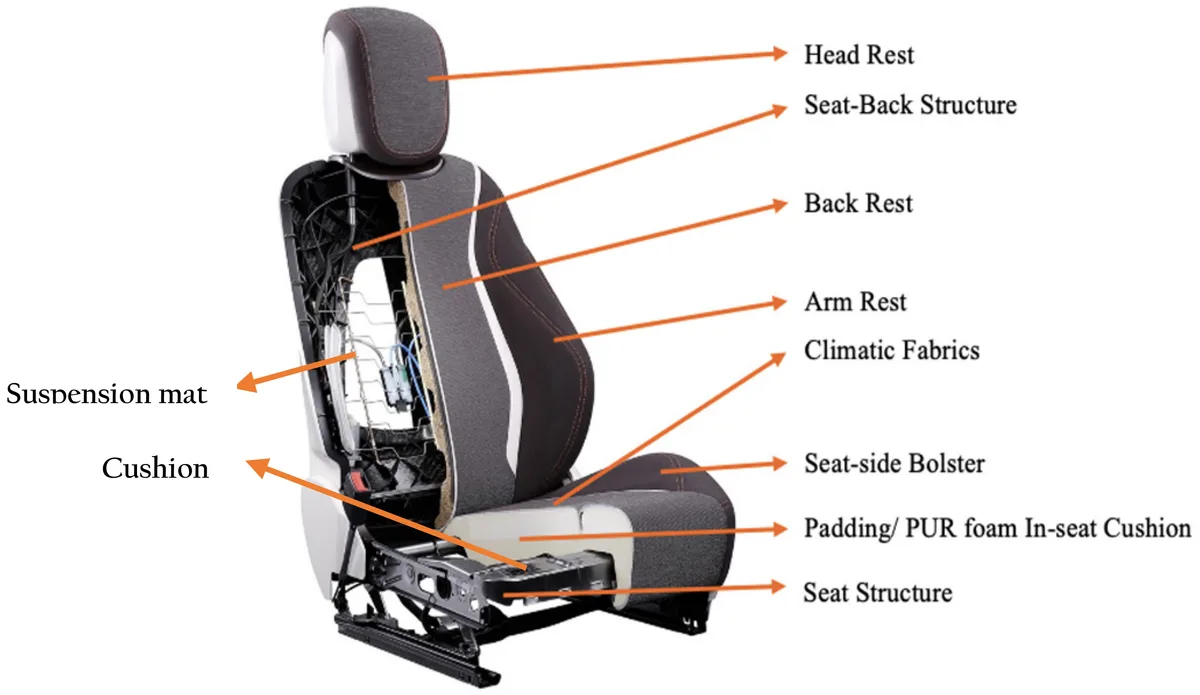
The repair method changes based on three things you can check in under a minute.
- Tear length. Measure from the tip of the tear to the other tip, not the visible gap.
- Tear depth. A surface tear stays in the topcoat. A full-thickness tear goes through the leather and exposes foam or fabric.
- Location. Flat panels barely flex. Side bolsters flex on every entry and exit. Both need different repair products.
| Tear size | What's usually damaged | Repair path |
|---|---|---|
| Under 1 cm | Topcoat, maybe top of leather | Flexible filler + colorant |
| 1 to 5 cm | Leather and sometimes backing | Heat-set patch + filler + colorant |
| Over 5 cm | Leather, backing, or foam | Professional stitching or replacement |
Depth matters more than length. If the tear is just a crack in the finish, filler alone works. If you can see foam, the edges need to be stabilised from behind before anything else.
Location also changes your choices. A tear on the side bolster takes more stress than a tear on the seat base. It also sees more sun through the window.
Use a product rated for flexible use in those spots.
Seat covers flex differently depending on where they sit, and some seat designs hold up better than others. If you're dealing with rear-seat damage from children, you'll also want to check which rear seating position is safest once the repair is done.
One warning matters more than any product advice. If the tear crosses a side-airbag seam, stop. The NHTSA's airbag safety guidance says to avoid altering or stitching through deployment zones.
Check your owner's manual before doing anything in that area.
Decision Guide: Pick Your Repair Path Based on the Tear
Small Tear: Under 1 cm
If the edges of the tear line up with light pressure, this is a cosmetic repair. Clean the area with a mild leather cleaner or rubbing alcohol. Apply a flexible leather filler with a small spatula, let it dry, then sand smooth.
Finish with a matched colorant and topcoat.
If the tear is a puncture with no loose flap, skip the filler and go straight to colorant. If the edges are raised or frayed, trim them gently first. A small tear on a flat panel is the easiest job you'll face.
If the tear came from a booster seat or car seat base, make sure the plastic isn't digging into the same spot again. Knowing the right booster age can help you avoid repeating the problem.
Medium Tear: 1 to 5 cm
Once a tear is bigger than a button, the edges usually pull apart when you sit. A simple filler repair will crack again. You need to stitch or glue a backing patch behind the tear before filling.
Use a heat-set patch or a flexible upholstery adhesive with a piece of leather or fabric. Pull the torn edges together, then let the adhesive cure fully. Once the patch holds, fill and color the surface like you would for a small tear.
If the tear is on a side bolster, choose a patch that is rated for leather and vinyl. That area flexes hundreds of times a day. A stiff patch will let go within a month.
Large Tear, Split Seam, or Foam Damage: Over 5 cm
If a tear is larger than 5 cm, the leather is usually too stretched to repair cleanly at home. The same is true for split seams and collapsed foam. A professional will remove the cover, patch or replace the panel, and re-stitch the seam.
Sometimes a replacement cover is cheaper than a complex repair. Get a quote from an upholsterer before buying $80 worth of materials that might not hold. If the tear affects a side-airbag area, you don't have a DIY option.
Take it to an authorised interior shop.
Foam damage also points to a bigger issue. Interior foam loses support with age, just like car seat materials have a usable life. If the cushion feels flat or the tear exposes crumbling foam, the repair should include new foam.
Tools and Repair Kits: What to Buy and What to Skip
A basic leather repair kit covers most small and medium tears. Look for one that includes flexible filler, colorant, grain paper, and a spatula. Some kits also add a heat-set patch for tears that need structural support.
| Kit component | What it does | When you need it |
|---|---|---|
| Flexible leather filler | Fills the tear and levels the surface | Tears under 1 cm |
| Heat-set patch | Bonds behind the tear to stabilise edges | Tears 1 to 5 cm |
| Leather colorant | Matches the factory dye | All visible repairs |
| Grain paper | Restores the leather texture finish | All visible repairs |
| Topcoat | Seals and protects the repair | All visible repairs |
| Spatula and sanding blocks | Applies and smoothes filler | All repairs |
Skip super glue, duct tape, and silicone-based adhesives. Super glue dries hard and shiny, then cracks. Silicone repels fillers and colorants, so your repair won't adhere.
Also avoid clear nail polish as a topcoat. It peels and looks worse within weeks.
One common replacement for a leather repair kit is a vinyl repair kit. They use different compounds. Manufacturers specify that vinyl repair materials work only on synthetic surfaces.
Buying the correct kit for your seat type saves you a second purchase.
Step-by-Step Leather Tear Repair Process
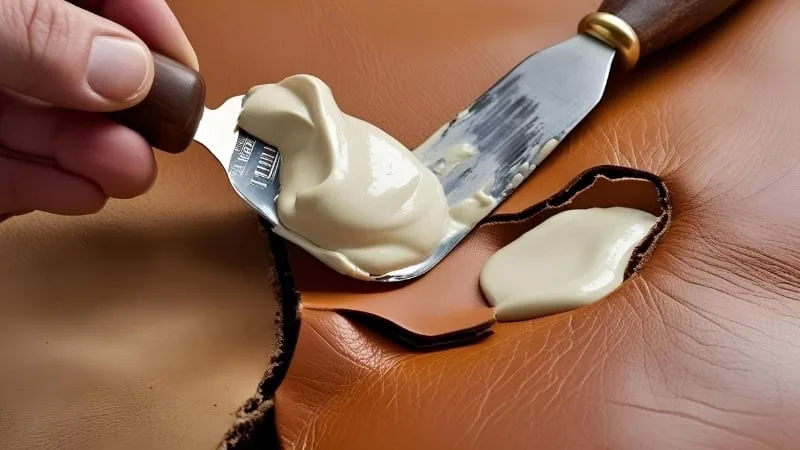
Work slowly. Rushing any step will show in the final result. Here's the process broken down into manageable steps.
Step 1: Clean the area. Use a mild leather cleaner or isopropyl alcohol on a microfiber cloth. Scrub away body oil, conditioner, and dirt. Grease in the tear will make the filler peel within days.
Step 2: Trim loose fibres. Cut away frayed edges with fine scissors. Keep the tear opening tidy. Loose strands cause lumps under the filler.
Step 3: Protect the surrounding leather. Apply pinstripe tape or painter's tape around the tear. This keeps filler and colorant off clean leather.
Step 4: Apply the filler. Use the spatula to push flexible leather filler into the tear. Slightly overfill it. The filler will shrink as it dries.
Step 5: Sand smooth. After the filler is dry, sand it level with 320 to 600 grit paper. Start coarse and finish fine. Wipe away the dust.
Step 6: Apply colorant. Use the matching leather colorant in thin layers. Two or three light coats look better than one heavy coat. Let each coat dry before the next.
Step 7: Restore the grain. While the colorant is still slightly damp, press grain paper over the repair. Hold it for a few seconds. This imprints a leather texture.
Step 8: Seal with topcoat. Apply the protective topcoat once the colorant is fully dry. This keeps the repair from scuffing and keeps moisture out.
Step 9: Let it cure. The seat will feel dry in 15 to 30 minutes. Full strength takes about 24 hours. Avoid sitting on the seat for a full day if possible.
Mistakes to Avoid That Ruin the Repair
Most failed leather repairs come from the same handful of errors. Avoid these and your repair has a strong chance of lasting.
- Using super glue. It dries hard, shines through the colorant, and cracks under flex.
- Skipping the backing patch. A filler-only repair on a tear wider than 1 cm will open again.
- Overfilling the tear. Too much filler creates a raised lump. You can't press it down once it cures.
- Sanding too aggressively. Heavy sandpaper eats through the leather's topcoat and leaves a dull spot.
- Wrong color matching. Factory dye fades over time. Match to the seat, not to the reference card.
- Ignoring the foam. If the foam underneath is torn, a surface repair won't hold.
- Repairing over an airbag seam. Never stitch or patch across a side-airbag deployment zone. The NHTSA's airbag safety guidance warns against altering those seams. Take that repair to a professional.
Cost Comparison: DIY Kit vs. Professional Repair vs. Replacing the Cover
Pricing as of 2026 shows why DIY is so popular. But it also reveals where a professional earns their fee.
| Option | Cost | Best for | Time needed | Skill level |
|---|---|---|---|---|
| DIY repair kit | $20 to $50 | Tears under 5 cm, no foam damage | 1 to 3 hours | Beginner |
| Professional repair | $100 to $200 per seat | Large tears, split seams, airbag areas | Same day | Expert |
| Cover replacement | $300 to $600 per seat | Severe damage, collapsed foam | 1 to 2 days | Professional only |
DIY makes sense for small surface tears and medium tears with a solid backing. You keep most of the cost savings and finish in an afternoon. The risk is low if you follow the process.
Professional repair becomes worth the money when the tear passes 5 cm or crosses stitching. A shop can remove the cover, patch from behind, and re-dye the whole panel. That hides the repair completely.
Cover replacement is the answer for seats with foam collapse or multiple deep gashes. At $300 to $600, it's cheaper than repeated failed repairs. Get a quote before buying materials, because sometimes replacement costs less than complex patchwork.
Maintenance After Repair: Condition, Protect, and Prevent Future Rips
A repaired seat needs the same care as the rest of the interior. Condition the leather every few months to keep the topcoat flexible and prevent new cracks. One important note: wait at least a week after a repair before conditioning.
The filler and colorant need time to fully cure.
UV light is the biggest enemy of leather. Park in the shade or use a sunshade, especially in hot climates. Sun-damaged leather dries out, shrinks, and tears much easier.
Pet claws, keys, and seat hardware cause most tears. Make it a habit to check pockets before sitting down. If you carry tools or sharp objects, place them in the trunk instead.
Car seats and booster seats are a common cause of rear-seat damage. The plastic bases dig into leather when installed tight. Use a thick seat protector or a towel under the base, and make sure children's feet aren't kicking the seat in front.
Knowing how long a car seat remains safe helps you plan upgrades before wear becomes damage.
Regularly wiping seats with a damp microfiber cloth removes abrasive dust. For deeper care, a dedicated leather conditioner keeps the hide soft and reduces stress at the seams. Taking these small steps will keep your repair invisible for years.
Frequently Asked Questions About Fixing Car Leather Seat Tears
Can I fix a car leather seat tear myself?
Yes, if the tear is under 5 cm and the foam underneath is intact. Use a flexible leather filler for small tears, or a heat-set patch for larger ones. Follow the full process, including colorant and topcoat, so the repair blends in.
Most DIY kits cost $20 to $50.
How long does a leather seat repair last?
A properly done repair lasts two to five years with normal use. The longevity depends on tear location, product quality, and whether the seat is conditioned regularly. Repairs on side bolsters that flex heavily tend to wear out faster than repairs on flat seat bases.
Will a leather repair kit work on vinyl or leatherette seats?
No, most leather repair kits are designed for genuine leather. Vinyl and leatherette need vinyl-specific repair compounds. Using the wrong filler will crack and peel.
Check the product label for the material it supports before buying.
Why does my leather seat repair keep cracking?
Cracking usually means the filler was applied too thick, the seat wasn't cleaned properly, or the repair didn't have enough flexibility. Another cause is skipping the topcoat, which leaves the colorant unprotected. Reapply filler in thin layers and always seal the repair.
Can a leather seat tear be repaired while it's still in the car?
Yes, most DIY repairs are done in the car. Clean the area, tape around the tear, and apply filler directly. Just make sure the seat is dry and the surrounding leather is clean.
For tears near airbag seams, remove the seat cover first or see a professional.
Final Verdict: When to Fix It Yourself and When to Call an Upholsterer
If the tear is under 5 cm and the foam is solid, fix it yourself. You'll spend $20 to $50 and a couple of hours. Match the tear size to the right method, follow the steps, and the repair will hold up well.
Call a professional if the tear is over 5 cm, crosses stitching, or sits near a side-airbag seam. Same goes for foam damage or collapsed seats. A pro can remove the cover, patch from behind, and re-dye the panel so the repair is invisible.
The worst outcome isn't a failed repair. It's making a small problem worse by using the wrong products. If you're in doubt, get a quote first.
Sometimes a professional repair costs less than a costly DIY mistake.