Complete Guide to How to Fix Torn Car Seat

Image source: Web (Bing) / nationaleducation.s3.amazonaws.com (Web image (fair-use with source credit))
A torn car seat is one of those small frustrations that somehow feels bigger every time you slide behind the wheel. If you've been wondering how to fix torn car seat damage without paying a fortune, the good news is that most tears are repairable at home. The bad news?
The wrong product or technique can make the damage look worse than before.
Manufacturer specs and aggregate repair reports put a basic DIY kit at $20 to $50, while a professional repair typically runs $50 to $150 per tear. That's a big gap for a job that often takes under an hour. The catch is that the right method depends on your seat material and the tear's shape.
So before you reach for a product, you need to look closely at what you're dealing with.
Quick Answer
Pick the repair method based on material and tear size. Small tears in leather and vinyl can be filled, colored, and textured. Cloth tears need an adhesive patch or stitching.
Deep punctures and torn seam areas often need professional help. Always check for side airbag seams before attempting any repair.
First, Look Before You Leap: Why Visual Diagnosis Wins
You cannot choose the right repair if you don't study the tear first. That sounds obvious, but plenty of people grab a generic kit and end up with a patch that peels or a color mismatch that draws the eye.
Step back and look at the damage in good light. Run your finger across the tear to feel if the edges are rough or clean. Check the area right around it for cracks, dryness, or loose fibers.
That quick inspection tells you more than any product label. A clean straight cut behaves differently than a ragged puncture. A tear on a flexible bolster needs a different approach than one on the flat seat base.
Car Seat Materials at a Glance: How to Tell Leather, Vinyl, and Cloth Apart
Seat material is the single biggest factor in how you repair a tear. Genuine leather, vinyl, and cloth each have different backing, stretch, and texture. Using a leather filler on vinyl can leave it too stiff.
Using a cloth patch on leather can look bulky and uneven.
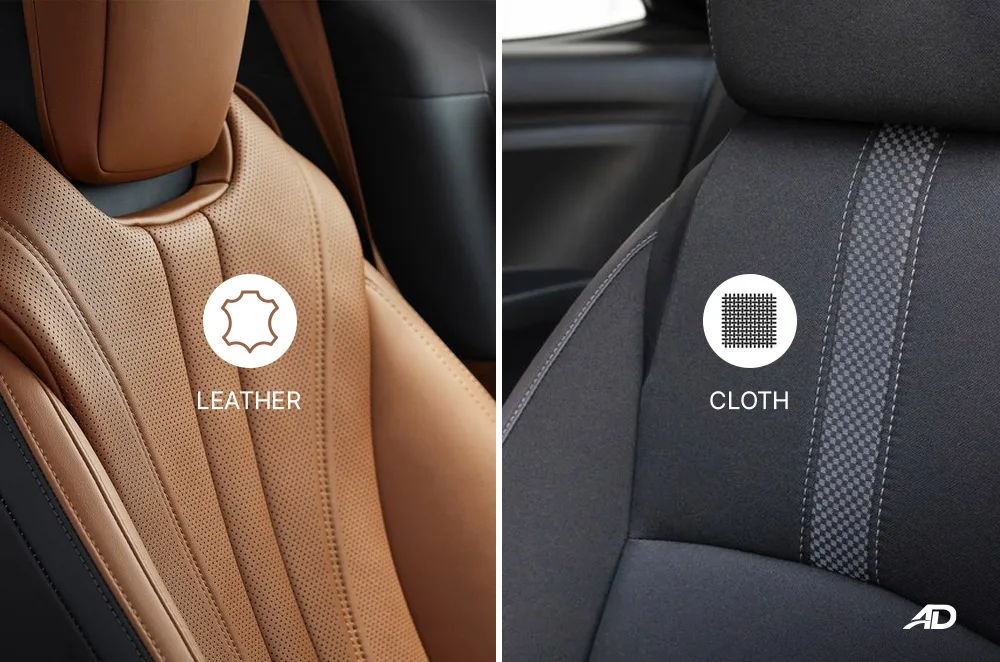
Image source: Bing (Web (fair-use with source credit))
Here's a quick way to tell them apart.
| Material | How to spot it | Repair approach |
|---|---|---|
| Leather | Porous surface with visible grain lines; feels warm to the touch; edges fray slightly | Flexible filler, grain texture pad, dye and topcoat |
| Vinyl | Smooth and slightly glossy; uniform texture; no natural grain | Vinyl-safe filler, heat-cure adhesive, colorant |
| Cloth | Woven fibers; soft and breathable; usually fabric loop or weave visible | Fusing patch, adhesive mesh, or stitching |
If your seats are genuine leather, a proper repair kit and a good conditioner will help the surrounding hide stay flexible. Once the repair is done, a regular conditioning routine can keep your seats healthy and slow down future cracking.
The Tear Directory: Straight Cuts, Punctures, Bolster Rips, and Seam Splits
Not all tears are the same. The shape and location of the damage change everything, from the repair method to the products you'll need.
- Straight cut. A clean slice, often from a key or a razor. Edges line up neatly, so a filler and texture pad can make it nearly vanish.
- Puncture. A small hole from a pen, heel, or pet claw. Needs a backing patch to hold the filler in place.
- Bolster rip. A tear along the curved side support of the seat. This area flexes constantly when you get in and out, so reinforcement is critical.
- Seam split. Stitching that has come undone along a factory seam. Best handled by re-stitching or using a flexible upholstery adhesive.
Tear length matters just as much as shape. Anything under 1 inch is usually a clean DIY job. Tears over 2 or 3 inches often need stitching, a partial re-cover, or a professional's touch.
The Right Repair for Each Tear: A Decision Flow
Here's the mental checklist we use when looking at any torn seat.
- If it's a small tear (under 1 inch) on leather or vinyl, use filler and a texture pad.
- If the material is cloth, use a fusing patch or hidden stitching.
- If the tear is larger than 2 inches, consider a professional or a partial re-cover.
- If the tear sits near a side airbag seam, stop and call a specialist. That's a safety-related repair, not a cosmetic one.
- If the foam underneath has collapsed or crumbled, repair the foam first before touching the surface.
One more tip: if you're comfortable with a needle and thread, a hidden stitch can pull edges together before you apply filler. That extra step makes the repair far more durable, especially on bolsters and other high-movement areas.
What Your Repair Kit Needs: A Visual Rundown
Before you start, gather the right tools. A basic kit covers most small tears, but cloth and vinyl repairs often need extra supplies.
| Item | What it does | When you need it |
|---|---|---|
| Repair filler | Fills the tear and creates a smooth surface | Leather and vinyl tears |
| Backing mesh | Reinforces the tear from underneath | Punctures and larger cuts |
| Grain texture pad | Imprints leather texture onto filler | Visible leather surfaces |
| Colorant or dye | Matches the surrounding seat color | After filler has cured |
| Topcoat or sealant | Protects the repaired area | Final step on leather or vinyl |
| Fusing patch or web | Bonds cloth fibers together | Cloth seats |
| Upholstery needle and thread | Stitches edges or seam splits | Cloth tears and seam damage |
| Fine sandpaper | Smooths filler edges | Before coloring |
| Cleaner and degreaser | Prepares the surface for bonding | Always |
Most combo kits include the filler, texture pad, colorant, and topcoat. That covers a typical leather or vinyl tear. For cloth, you'll usually need a separate patch kit.
If you're using solvent-based adhesives or cleaners, work in a well-ventilated space. Gloves are a good idea too. For specific exposure limits and safe handling guidance, check the OSHA recommendations on solvent safety.
Step-by-Step: Fixing a Small Tear Without Making It Look Worse
The process looks simple on paper, but the details make the difference. Clean, fill, sand, texture, color, seal. Each step has a purpose, and skipping one usually shows up in the final finish.
Before you start, make sure the surrounding foam is intact. If the foam has collapsed, the surface repair will just sink in. For a small tear under 1 inch, you can press the edges together and work from the front.
For anything larger, you'll want a backing mesh underneath to hold things in place.
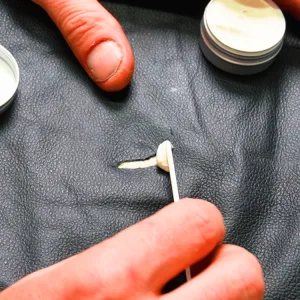
Image source: Bing (Web (fair-use with source credit))
Leather Grain and Color Matching
Start by cleaning the area with a leather-safe cleaner and a damp microfiber cloth. Let it dry completely. Any oils or dirt left behind will weaken the bond.
Apply the filler compound in thin layers. A small spatula works best. Slightly overfill the tear, because the filler will shrink as it cures.
Most compounds dry in 15 to 30 minutes between coats.
Once dry, sand the area flat with fine-grit sandpaper. Use gentle pressure to avoid roughing up the surrounding leather. Then press a grain texture pad into the filler while it's still slightly soft.
For the best color match, apply the dye in thin coats and feather the edges outward. Finish with a topcoat to seal and protect the repair.
Vinyl Heat-Cure Technique
Vinyl tears respond well to heat-activated repair compounds. These products bond differently than standard filler, and they stay flexible after curing.
Clean the area and apply the vinyl repair compound with a spatula. Use a heat gun or a household iron with a barrier cloth. Keep the heat moving, and avoid holding it in one spot too long.
The compound will level out as it heats. Let it cool completely before touching it.
Color matching on vinyl is trickier than on leather. Vinyl has a slight gloss that catches the light. Apply a vinyl-specific colorant and finish with a matte or gloss sealer depending on the seat's original finish.
Cloth Patch and Fuse Method
Cloth seats need a different approach entirely. No filler, no texture pad.
Cut a piece of fusing web or adhesive mesh slightly larger than the tear. Slide it behind the damaged area. If the tear is along a seam, use an upholstery needle and thread to stitch it first.
Then apply heat with an iron and a barrier cloth to activate the adhesive.
Trim any loose fibers around the edges before fusing. After the patch bonds, use a small amount of fabric glue on the surface edges for extra staying power. Let the glue dry fully before sitting on the seat.
The Visual Mistakes That Scream "DIY Repair"
The goal of any repair is to make the damage disappear. Several common mistakes make it obvious that a repair happened at all.
- Color mismatch. The number one giveaway. Blend the dye beyond the tear line, not just on the filled area.
- A visible border. A hard edge around the filler looks like a sticker. Feather the filler and sand the edges smooth.
- Shiny spots. Too much topcoat makes the area glare under light. Use a matte finish if the seat isn't glossy.
- Bumpy texture. Skipping the grain texture pad leaves a flat, golf-ball surface next to natural leather grain.
- Peeling edges. That happens when the surface wasn't cleaned properly or the filler was too thick.
Aggregate reviews of repair kits show that most failures come back within a few months. The common denominator is usually surface prep, not the product itself. Clean the area, use the backing where needed, and don't rush the drying time.
When to Let a Pro Handle It: Airbag Seam Safety and Large Tears
Some repairs are not worth the risk. The biggest one? Anything near a side airbag seam.
Side airbags deploy out of the seat bolster on many vehicles. If you stitch or glue across that seam, you can prevent the airbag from deploying correctly. That's a serious safety risk, and it's not something a DIY repair kit is designed to handle.
If the tear is anywhere close to the airbag module or the stitching line, take the car to a qualified upholstery shop. For official guidance on airbag safety and seat-mounted airbags, check the National Highway Traffic Safety Administration's airbag resources at NHTSA.gov.
Large tears over 2 or 3 inches also deserve a professional eye. They usually need a patch sewn into the backing, or a partial re-cover of the seat panel. A pro can match the stitching pattern and factory lines in a way that home repairs rarely match.
It costs more, but the result is a seat that looks factory fresh.
Repair Cost vs. Replacement Value: The Numbers You Should Know
Let's talk real numbers. This is where DIY beats a full re-cover by a huge margin.
| Option | Typical cost | What you get |
|---|---|---|
| DIY small tear kit | $20 to $50 | Filler, colorant, texture pad, topcoat |
| Professional cosmetic repair | $50 to $150 | Proper grain match, durable finish |
| Partial seat re-cover | $200 to $400 | New panel for the damaged section |
| Full seat cover replacement | $400 to $800+ | Entire seat re-covered, like new |
Your decision should factor in the car's value. If it's a 15-year-old daily driver, a $30 DIY kit makes sense. If it's a late-model luxury car you plan to sell, a professional repair protects your resale value better.
One more thing to check before you spend anything. Look at the condition of the foam and the rest of the seat. If the material is brittle and cracking across the whole panel, a single repair won't solve the bigger problem.
In that case, a full re-cover is the better investment.
Keeping the Repair Invisible Over Time
A fresh repair can look perfect for a week, then lift or crack after the seat flexes a few hundred times. You can slow that down with a few habits.
Let every layer cure completely. Most kits need 24 hours before the seat is used. Indoor temperature and humidity affect that, so be patient.
Use a UV protectant on the repaired area. Sun exposure is the main reason leather and vinyl dry out and re-crack. Park in the shade when you can, or use a windshield shade to reduce cabin heat.
Finally, keep the material conditioned. Leather seats especially need regular feeding to stay supple. A simple wipe-down with a quality leather conditioner every couple of months goes a long way.
That routine also keeps the surrounding leather healthy, so the repaired spot doesn't stand out as the one dry patch on the seat.
The 30-Second Visual Reference Guide
This is your cheat sheet. Match your material and tear type to the right action without re-reading the whole article.
| Material | Tear type | Right repair | Time to finish |
|---|---|---|---|
| Leather | Small cut under 1 inch | Filler, grain pad, dye, topcoat | 1 to 2 hours |
| Leather | Large tear over 2 inches | Professional stitching or partial re-cover | 4+ hours |
| Vinyl | Small puncture | Vinyl filler, heat cure, colorant | 1 to 2 hours |
| Cloth | Straight tear | Fusing patch or hidden stitching | 30 to 60 minutes |
| Cloth | Seam split | Upholstery needle and thread | 1 hour |
| Any | Tear near side airbag | Professional only | n/a |
What the visual inspection tells you
Run your fingers along the tear. Rough edges mean fiber damage. Clean edges mean a surface cut.
Press down on the foam underneath. If it sinks, you need foam repair first. Look at the grain pattern around the tear.
If it's leather, you'll need a texture pad to match it.
Do that quick check, and you'll avoid the most common DIY fails.
Frequently Asked Questions
How long does a torn car seat repair take?
Most small tears take 1 to 2 hours of hands-on time. That includes cleaning, filling, and the first coat of color. But the full cure time is 24 hours.
Don't sit on the seat during that window.
Can I fix a torn car seat without a repair kit?
For cloth seats, yes. A fusing patch and an iron can work. For leather or vinyl, you really need a filler and colorant.
A kit is the cheaper and cleaner option. Piecemeal products often cost more and leave visible edges.
Is it safe to repair a car seat near an airbag seam?
No. Never repair a tear on or near the side airbag deployment seam. Stitching or glue can stop the airbag from deploying.
Take it to a professional upholstery shop. That's a safety issue, not a cosmetic one. If you're thinking about seating positions in general, the guide to the safest spot for a car seat is worth reading.
I have a child car seat with a torn cover. Can I repair it?
Usually not. Child car seats have strict safety standards, and some covers are structural. Check whether the cover is replaceable before doing anything.
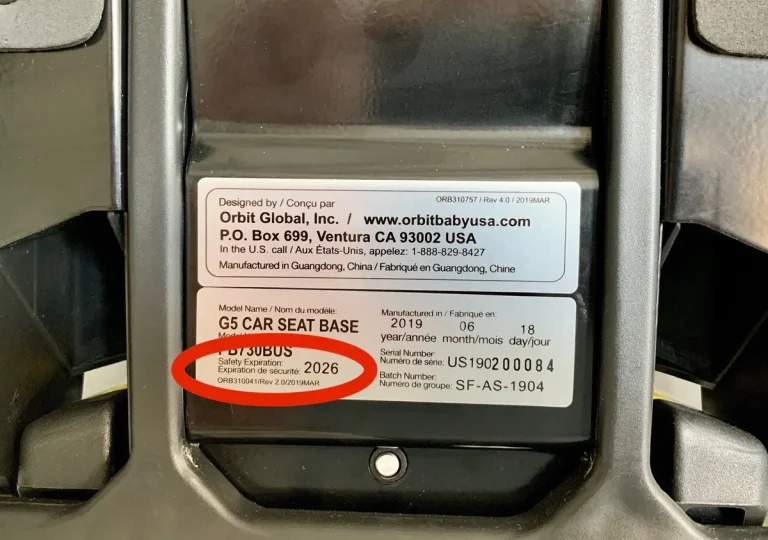
Also look at the seat's expiration date, because an older seat may not be worth fixing. Here's what you need to know about car seat expiration.
Will the repair look exactly like the original?
Not 100%, but close. A good repair is nearly invisible from a few feet away. Up close, you might notice a slight difference in texture or gloss.
That's normal, even for professional repairs.
How do I prevent future tears in my car seats?
Keep the material conditioned and park out of the sun when possible. For leather, a quality conditioner every few months adds real protection. If you have pets, use a seat cover or hammock.
And watch how your kids climb in and out. The right habits go a long way.