
When Do You Stop Using Infant Car Seat? A Parent Guide
Not sure if you’ve stared at a car seat label lately, but those tiny numbers cause a lot of confusion. Most parents think they know the answer to “when do you stop using infant car seat”, but the real answer is buried in the fine print on the side of the seat, not in a baby book. The short version?
You stop the moment your child hits any of three specific limits. Age barely matters. Height matters.
Weight matters. And there’s a one-inch head clearance rule that trips up nearly everyone.
As of 2026, the American Academy of Pediatrics recommends keeping children rear-facing until age two, or longer if the seat allows. But those are minimums, not maximums. Manufacturer specifications for infant seats typically max out between 22 and 35 pounds, with height caps around 29 to 32 inches.
That’s the real math you need to know. Let’s break down exactly what those limits mean, how to measure them correctly, and what to do the second your child outgrows the carrier.
Quick Answer
You stop using an infant car seat when your child exceeds any one of its limits. Those limits are the height limit, the weight limit, or the one-inch shell rule. Check the sticker on the side of the seat.
If your child’s head is less than one inch below the top of the hard shell, it’s time to switch. Most babies hit the height limit first, usually between 12 and 18 months. The next seat is a convertible car seat, used rear-facing.
Why Extended Rear-Facing Actually Matters More Than the Seat Itself
Here’s what keeps child passenger safety technicians up at night: not the seat itself, but the position of that seat in the car. Rear-facing isn’t just a stage you pass through. It’s the safest way for a child to ride, period.
When a crash happens, the force throws the body forward. In a rear-facing seat, that force spreads across the entire back, neck, and head. The seat shell absorbs the impact.
In a forward-facing seat, those same forces concentrate on the harness straps and the child’s spine, which is still developing. The neck vertebrae don’t fully ossify until around age three or four. That’s a hard anatomical fact, not a parenting opinion.
The American Academy of Pediatrics reviewed decades of crash data and concluded that rear-facing reduces the risk of severe injury by over 70 percent compared to forward-facing for children under two. That’s why their policy statement recommends rear-facing until at least age two, and ideally until the child maxes out the seat’s height or weight limits. Not one year.
Not twenty pounds. Age two, as a bare minimum.
The transition to a convertible seat rear-facing mode is the only correct next step. If you’re reading this and thinking about moving straight to forward-facing, slow down. That’s the single most dangerous jump you can make.
More on that in a moment.
The Three Hard Limits on Every Infant Seat
Every infant car seat has three absolute limits printed on its label. Ignore any one of them, and the seat stops protecting your child the way it was designed to.
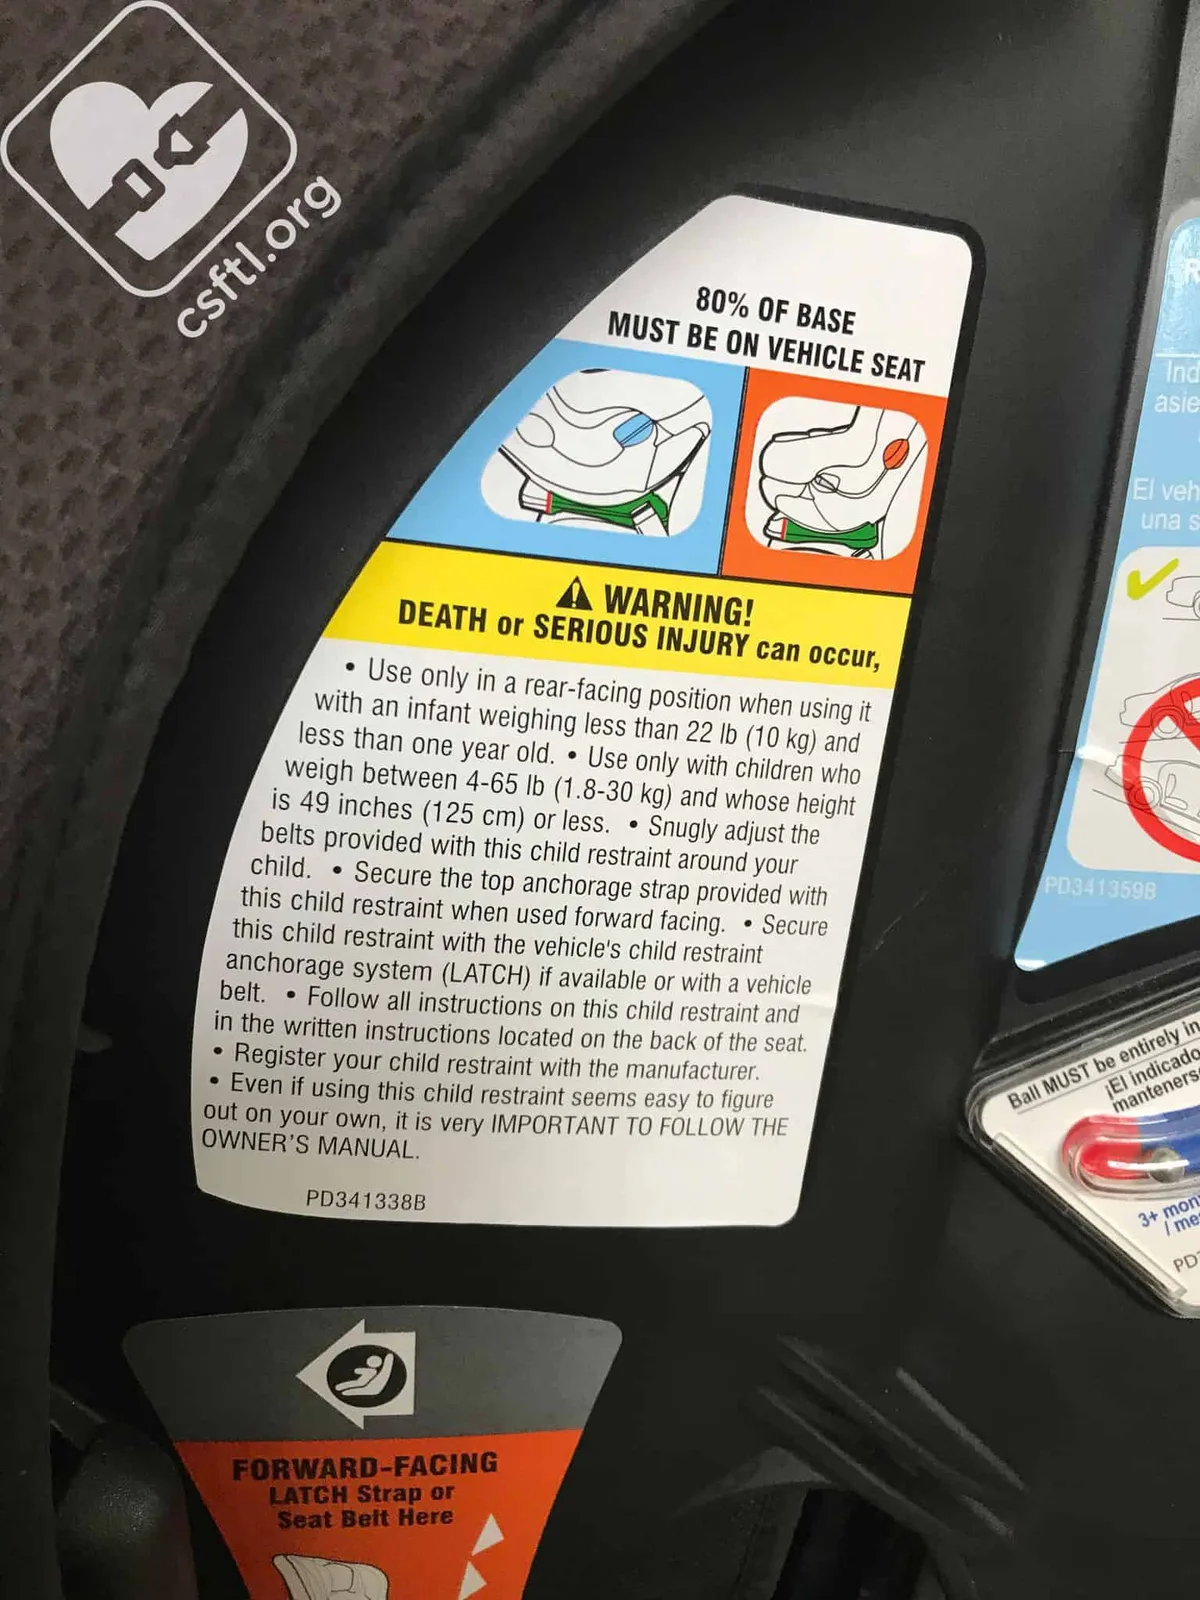
Image source: Bing (Web (fair-use with source credit))
Limit #1: The Height Limit
The height limit is measured along the child’s body, not standing up. It’s usually etched into the side of the seat shell near the head area. For most infant seats, that’s 29 to 32 inches.
If your child’s shoulders crest the height marker, or if their head reaches the top of the shell, they’ve outgrown it. Even if they’re below the weight limit.
Limit #2: The Weight Limit
The weight limit is the easiest to check. It’s stamped on the label, typically between 22 and 35 pounds. For many babies, the height limit arrives first.
But for a chunky, short-legged toddler, the weight limit might be the trigger. Once your child hits that number on the bathroom scale with clothes on, it’s time. No rounding.
No “just one more ride.”
Limit #3: The One-Inch Shell Rule
This third limit is the one that catches most parents off guard. Even if your child is under the height and weight limits, the seat is done the moment there’s less than one inch of hard shell above their head. That inch of plastic is your child’s only crush zone in a crash.
Without it, the head can strike the vehicle seat or the car’s interior. We’ll measure this properly in the next section.
| Limit Type | Typical Range | What Triggers the Switch |
|---|---|---|
| Height | 29-32 inches | Head reaches top of shell or height marker |
| Weight | 22-35 lbs | Scale reads at or above the printed number |
| Shell Clearance | 1 inch minimum | Less than one inch of hard shell above the head |
The “One-Inch Rule” Broken Down: Where to Measure Exactly
Let’s get precise. The one-inch rule is simple, but measuring it wrong leads to either a premature switch or a dangerously late one. Both are bad.
Here’s how to measure it right, in under a minute.
Place your child in the seat with the harness snug, just as they’d ride in the car. Look at the top of the seat shell directly above your child’s head. That plastic ridge is the reference point.
Now check the gap between the top of your child’s head and that ridge. That gap needs to be at least one inch. Not a half inch.
Not a finger’s width. One full inch.

Image source: Web (Bing) / storage.googleapis.com (Web image (fair-use with source credit))
If your child has a thick head of hair, press the hair down flat before measuring. We’re measuring the skull, not the hairstyle. Also, check in the exact seating position, not slouched.
The seat recline angle can change the measurement by a surprising amount.
A smart trick is to feel with the flat of your hand. Place your hand flat on top of your child’s head, then slide it toward the shell. If your hand touches the shell within about your index finger’s width, you’re cutting it too close.
If there’s room for your whole hand to slide flat, you’re fine. It’s not a perfect test, but it gives you a quick gut check before you do the precise measurement.
If the gap is less than one inch, the seat is outgrown. Period. Do not pass go.
Move to the convertible seat now. This isn’t a “watch and wait” situation. The margin of safety is gone.
Common Mistakes Parents Make When Deciding to Switch
Parents aren’t careless. They’re misinformed. The Internet is full of outdated advice, well-meaning grandparents, and forum posts that confuse more than they help.
Let’s clear up the biggest errors we see in our research.
Mistake #1: Switching Forward-Facing Too Early
The biggest mistake? Moving to forward-facing the day the child turns one. The law in most states technically allows it.
The science says wait. FMVSS 213 crash testing shows rear-facing is substantially safer for toddlers. Waiting until age two, or until the seat’s limits, isn’t overprotective.
It’s evidence-based.
Mistake #2: Ignoring the Height Limit
Parents watch the scale obsessively but forget the height marker. Your child can be 10 pounds under the weight limit and still be unsafe because their head is at the top of the shell. Height limits exist to protect the neck and spine during a crash.
They’re not a suggestion.
Mistake #3: Reading the Label Wrong
Infant seats have a label for forward-facing limits too. Parents sometimes mistake those for rear-facing limits and over-rely on them. Read the label carefully.
It will say “Rear-Facing” with specific height and weight numbers. That’s the column that matters. Similarly, some parents misread the expiration date sticker as a “use by” date for the entire seat.
It’s actually the manufacture date. Seats expire 6 to 10 years from that date, depending on the brand.
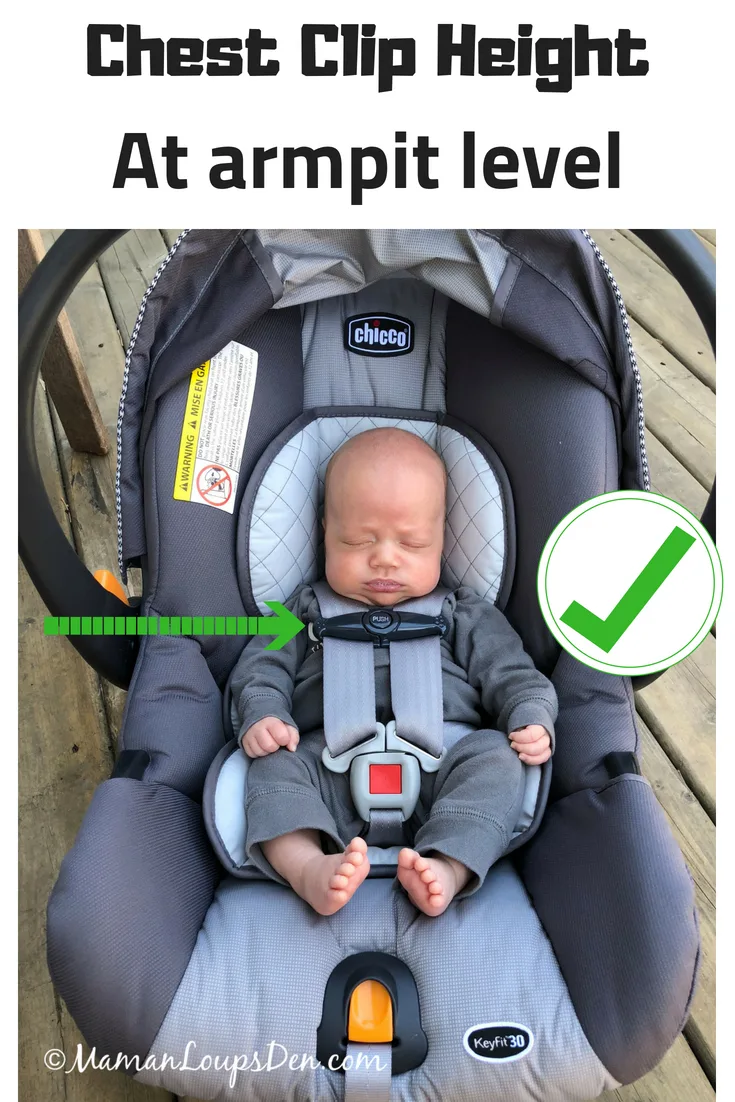
Image source: Bing (Web (fair-use with source credit))
Mistake #4: Forgetting the Harness Strap Position
Even if your child fits the seat, the harness needs to fit too. In rear-facing mode, the harness straps must be at or below your child’s shoulders. As they grow, you’ll need to move the straps up through the slots.
If the straps are too low, the harness won’t hold them properly in a crash. If they’re too high, the child can slide out under the strap. The harness position is as critical as the height and weight limits.
Mistake #5: The Hand-Me-Down Seat
Used infant seats are a gamble. You don’t know the crash history. You can’t verify the expiration date reliably if the label is worn.
And if it’s been on a plane or in a different car, the tension on the plastic could be compromised. Manufacturer warranties don’t transfer. If you’re unsure, skip it.
The cost of a new convertible seat is worth the peace of mind.
Mistake #6: The Puffy Jacket Trap
In winter, parents strap a bulky coat on the child, then tighten the harness. The harness looks snug, but the coat compresses in a crash, leaving slack. That slack is dangerous.
A thick coat can add two to three inches of space. The rule? Dress the child in thin layers for the car ride, then put the coat on over the harness for the walk outside. or, keep a blanket in the car to throw over the child after they’re buckled.
This is a concrete, fixable issue that far too many parents miss. If you’ve ever found yourself wondering whether you’ve over-tightened the harness, that’s a good sign you need to check for coat compression first. Run this same check every single time the weather turns cold.