Beginner’s Guide to How to Get a Car Seat Out
So you need to know how to get a car seat out of your car. Whether you're moving it to another vehicle, cleaning up after a spilled sippy cup, or retiring a seat that's seen better days, the process is simpler than all those straps and buckles suggest. But it only goes smoothly when you know which release system you're dealing with.
That's exactly what this guide walks you through.
Manufacturer specifications indicate that most infant seats click out of their bases with a single squeeze, while convertible seats need a bit more finesse. As of 2026, the safest approach is always the same: check your manual, then take the path your seat's installation type demands. We'll show you how to tell the difference, and exactly what to press, pull, or unclip to get that seat free.
First: Know What Kind of Car Seat You're Dealing With
Before you touch a single latch, you need to know what kind of seat you actually have. The removal process changes completely based on the design, and guessing wrong can leave you yanking on a strap that's supposed to stay put. Fortunately, you can figure it out in about ten seconds by looking at the seat's shape and how it sits in the car.
Infant Carrier, Convertible, or Booster?
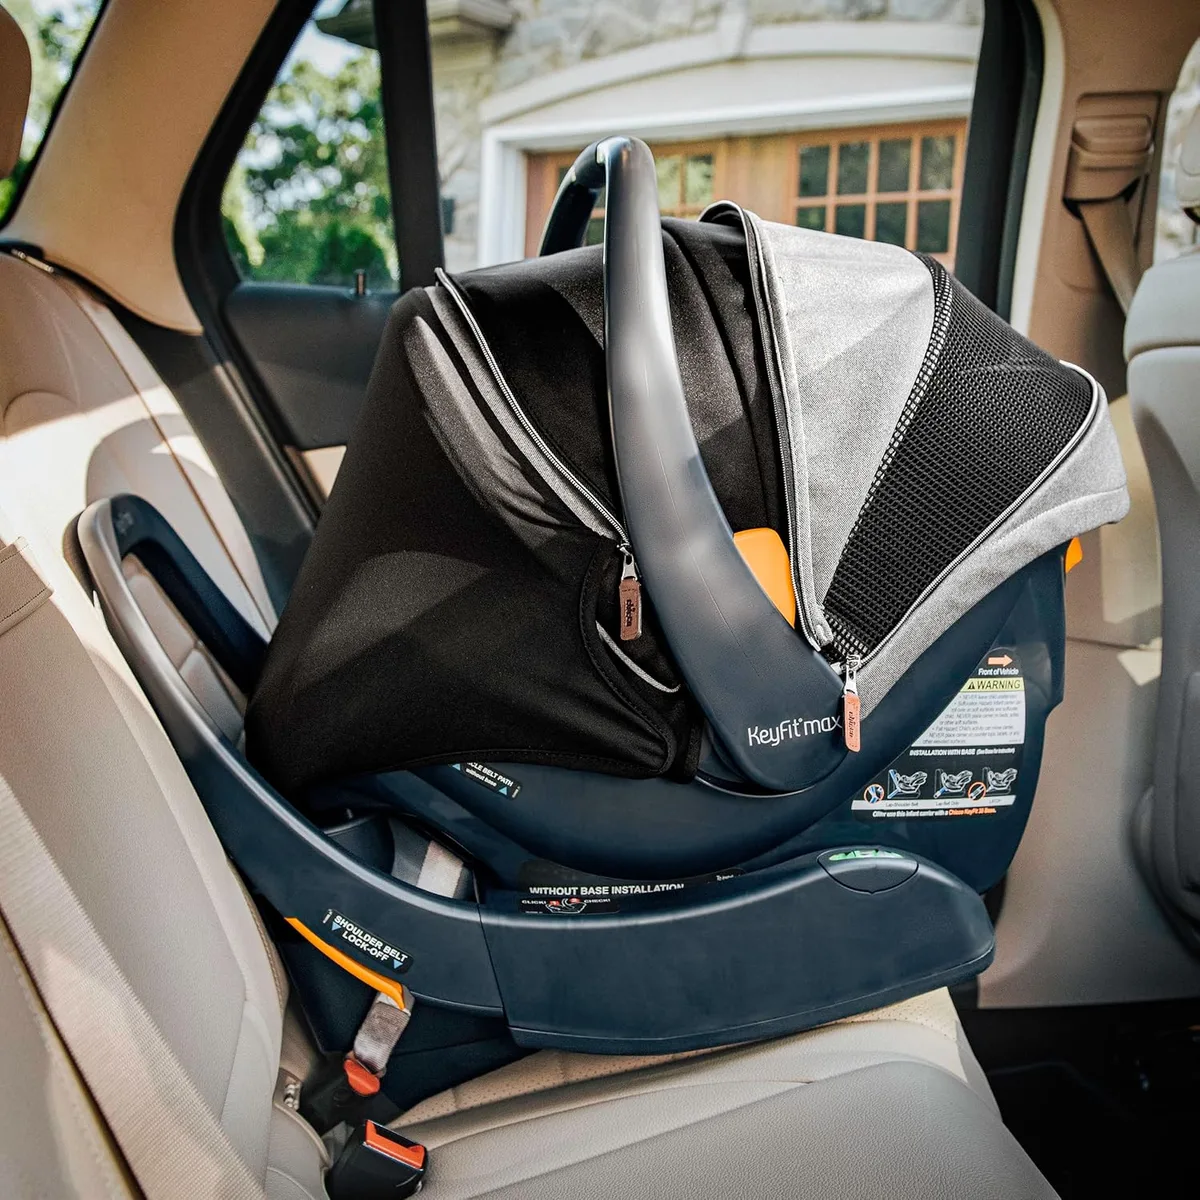
Infant carriers are the bucket-style seats that come with a separate base. They have a carry handle and click in and out of that base without any tools. Convertible seats stay in the car once installed and turn from rear-facing to forward-facing as your child grows.
All-in-one seats are basically convertibles with a booster mode built in. Boosters are the simplest of all: no anchors, no tether, just the seat belt holding them in place.
| Seat type | Typical age range | How removal works |
|---|---|---|
| Infant carrier | Birth to around 2 years | Unclip from base, lift handle |
| Convertible | 1 to 7 years | Unhook tether, release LATCH or unthread belt |
| All-in-one | 1 to 10+ years | Same as convertible |
| Booster | 4 to 12 years | Just pick it up, seat belt unhooks |
If you've been thinking about when your little one moves up to a booster, the signs are pretty clear. Check out our booster readiness guide when you get to that point. For now, focus on the seat in your backseat.
LATCH vs Seat Belt Installation
Look at the seat's base or sides. Do you see metal clips that click into little bars between the seat cushions? That's LATCH, which stands for Lower Anchors and Tethers for Children.
If instead you see a slot for the vehicle's seat belt to thread through, your seat is installed with the belt. Some seats can be installed either way, so you might have both.
Still not sure? Check the top of the seat. If there's a strap with a hook that attaches to the back of the vehicle seat, that's the top tether.
Convertible and forward-facing seats almost always have one. If your seat has all three, LATCH connectors on the sides and a tether strap, you're dealing with a system that's easy to remove once you know the releases.
Quick Answer: Which Release Mechanism Matches Your Seat?
To get a car seat out, press the base release button if it's an infant carrier. If it's a convertible, unhook the top tether and detach the LATCH clips or unthread the seat belt. Always read the manual first.
Removing the wrong release could damage the seat.
How Car Seat Release Mechanisms Actually Work
Every car seat removal boils down to reversing the installation. That means you're undoing the exact mechanism that held it in place. Most parents get stuck not because the release is hard, but because they don't know where to look.
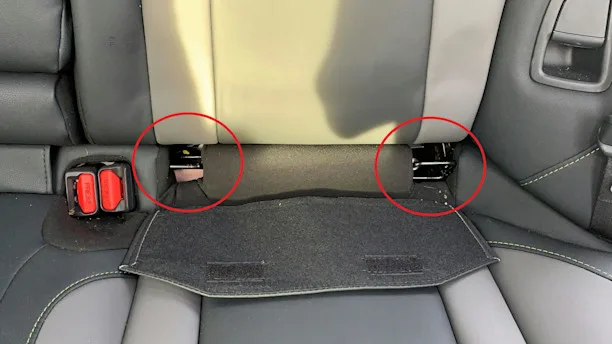
Base Release Levers and Buttons
Infant car seat bases have a spring-loaded release lever, usually at the front and often colored red. When the carrier clicks in, a latch grabs onto the base's two side bars or a center hook. To release it, you press the lever while lifting the carrier handle.
The motion is a gentle squeeze, not a fierce tug.
Some bases also have a recline foot that can get wedged against the vehicle seat. If the carrier won't budge, check that foot first. A tiny plastic adjuster can block your removal even when the release lever is pressed.
Lower Anchor Connectors and Tether Hooks
LATCH connectors are the metal clips on the sides of convertible seats. They hook onto metal bars anchored in your vehicle's seat bight, the crack where the seat back meets the seat cushion. Each connector has a small release button, usually red or gray, that you press to open the clip.
Once both clips are open, the seat comes free.
The top tether works differently. It has a hook that attaches to a cargo anchor, usually on the back deck or ceiling of your vehicle. To remove it, you pull the hook's release tab or squeeze the sides, then lift it off.
It's straightforward, but many parents forget it's there and waste five minutes trying to yank the seat over the tether.
For official LATCH guidance, the National Highway Traffic Safety Administration offers clear diagrams and weight limits. Per their recommendations, you should always stop using LATCH when the combined weight of the child and seat hits the lower anchor limit specified in your manual.
Seat Belt Lock-Offs and Retractors
Seat belt installations are a different beast. Some vehicle belts have a locking retractor that goes tight and stays tight. Others rely on a lock-off clip built into the car seat itself, a small plastic clamp that squeezes the belt tight.
To undo it, you either release the retractor by pulling the belt all the way out, or you open the lock-off clip.
Knowing which type you have makes removal much easier. If the belt won't move at all when you push on it, you're probably fighting a locking retractor. Give the seat belt a sharp pull to release the lock, and you'll feel it loosen right away.
How to Remove an Infant Carrier From Its Base
Infant carriers are the easiest seats to remove, and that's by design. You're supposed to be able to click the whole thing out to carry your sleeping baby into the house. Here's how to do it without wrestling match.
- Make sure the carrier is sitting level in the base. A crooked carrier can jam the release mechanism.
- Locate the release lever at the front of the base, below the carrier's edge.
- Press the lever firmly with one hand.
- Grasp the carry handle with your other hand and lift straight up.
- If it doesn't pop free, rock the carrier gently side to side while pressing the lever.
That's it. The carrier lifts out, and you're left with just the base bolted to the seat. If your infant seat doesn't have a base and was installed using the seat belt, the process is a little different.
You'll unthread the belt from the carrier's belt path and press the harness release to remove the seat from the car entirely.
Some parents wonder what comes after the infant carrier, and there's a good answer for that too. The next seat after infant carrier is usually a convertible, and those need a completely different removal method.
How to Remove the Base From Your Car
Once the carrier is out, the base still needs to come. This is where people usually realize they've forgotten how the base was installed in the first place. Don't worry.
We'll walk through both types.
Detaching a LATCH-Installed Base
LATCH bases have connectors on the sides that snap onto the vehicle's lower anchors. To remove:
- Push the vehicle seat cushion back if you need more room to see.
- Press the release button on the left connector, then the right one.
- Give each connector a slight tilt to disengage it from the anchor bar.
- Slide the base forward and out of the seat bight.
If the straps are tight, you might need to pull the base toward you while pressing the buttons. That's normal. The design keeps things snug during driving, so a little force in the right direction is expected.
Unthreading a Seat Belt-Installed Base
Seat belt bases take a bit more patience because you're reversing a thread, not just unclicking clips.
- Find where the seat belt crosses the base, usually through a slot near the back or side.
- Press the base's belt lock-off clip, if it has one, to open the clamp.
- Pull the seat belt webbing upward to release any tension.
- Carefully back the belt out through the slot, feeding it back the way it came.
- Let the seat belt retract fully before you lift the base off.
Some bases also have a storage slot for the seat belt's latch plate, which can keep the belt trapped until you rotate the plate. If the belt feels stuck, check that the latch plate isn't wedged underneath the base's plastic shell.
After removal, it's a good idea to give the base a quick visual once-over. Look at the lower anchor connectors for cracks or rust, and check the seat belt path for frayed edges. A damaged base should never be reinstalled.
Many people don't realize that car seats expire, but the expiration guidelines are simple once you know where to check.
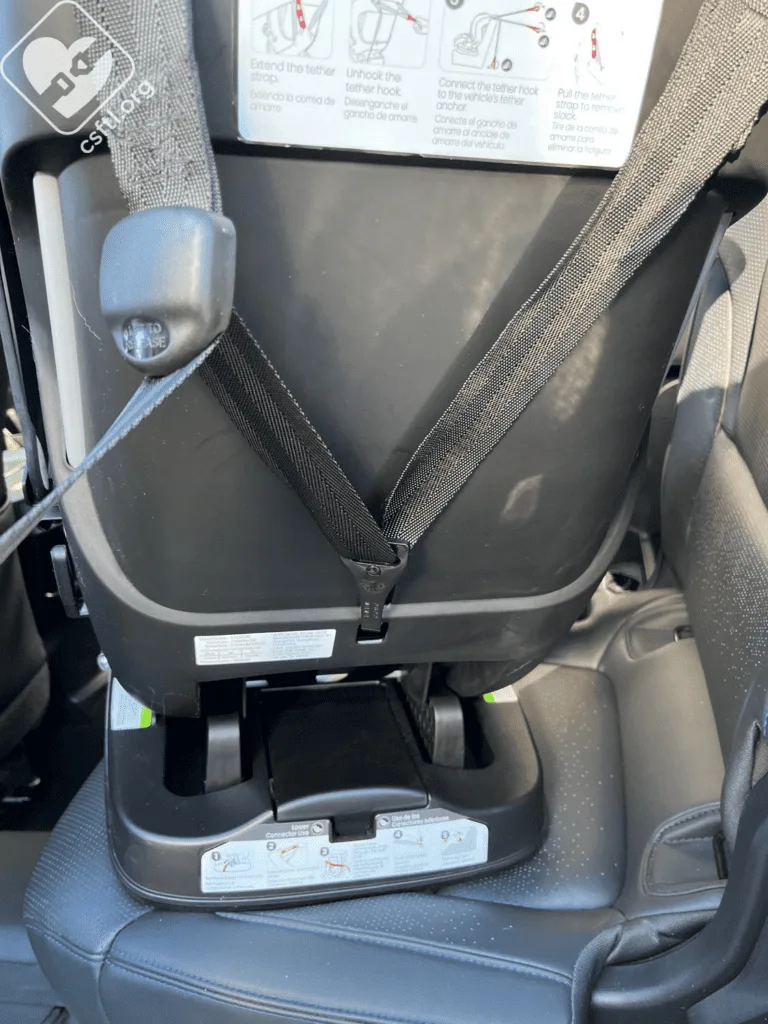
How to Remove a Convertible or All-in-One Seat
Convertible seats take longer to remove than infant carriers, but the process is still under two minutes. The key is working in the right order. Never pull the seat before you've released the tether, or you'll find yourself stuck and wondering why.
LATCH Release Steps
Start with the top tether, since it's the easiest to forget. Squeeze the hook's release tab and lift it off its anchor point. Then move to the lower connectors.
Press the red release button on each LATCH connector and push the clip inward to unhook it from the vehicle anchor. Pull the seat straight out of the vehicle seat bight. If it feels tight, rock it gently while you pull.
Seat Belt Release Steps
Seat belt installs need you to find the lock-off clip first. Most convertibles have one at the belt path, sometimes hidden under fabric. Open the clamp, then pull the seat belt webbing to give yourself slack.
Work the belt back through the slot, feeding it the same way it came in. If the belt won't retract, pull it sharply to release the locking retractor. That usually frees everything up.
Unhooking the Top Tether
The top tether is the strap that runs over the top of the vehicle seat toward the back cargo anchors. Some anchors live on the rear deck, others on the seat frame, and a few trucks have them on the back wall.
To unhook, squeeze the release tab on the tether clip and pull it straight off the anchor. Let the strap rest on the seat back. A lot of parents give up here and leave the tether hanging, but that weakens the seat's stability on the next install.
Just unhook it properly.
Common Stuck Points and Fixes
Some seats fight back. That's usually because a small detail got overlooked, not because the seat is broken. Here are the most common traps and how to escape them.
| Stuck symptom | Likely cause | The fix |
|---|---|---|
| LATCH strap won't loosen | Connector still engaged | Press the release button and push the clip inward |
| Release button won't press | Strap tension is pulling the clip | Apply downward pressure on the strap, then press |
| Carrier won't lift off base | Recline foot is blocking the base | Adjust the recline foot to its upright position |
| Seat belt won't come out | Locking retractor is engaged | Pull the belt sharply to disengage the lock |
| Tether hook stuck | Hook twisted on the anchor | Lift and rotate the hook until the tab springs free |
If the LATCH strap is tightened to a locked position, pull the strap outward slightly to release the internal tension before pressing the button. This is the number one reason connectors seem jammed. In our research, most "stuck" seats resolve once the tension is off.
Mistakes That Damage Seats or Worse
Getting a car seat out isn't hard, but it's remarkably easy to do wrong. The worst mistakes usually come from rushing. Plan for two extra minutes and you'll avoid most of them.
- Pulling the seat before unhooking the tether. The tether will dig into your fingers and yank the seat back down. Release it first.
- Pressing the release button with all your strength. You only need gentle pressure plus a pivot motion to pop LATCH clips free.
- Forgetting the recline foot on an infant base. Some bases have a leg that locks into the vehicle seat, and pulling the whole assembly risks cracking the base.
- Installing the seat with the harness still buckled. Remove any child or fabric mass before you start, or the straps will catch on the seat structure.
- Not reading the manual. Every seat designer uses a slightly different release angle, and the manual prints the exact motion.
One more serious mistake: removing a seat that's been in a car wreck. If the vehicle was in a moderate or severe crash, check the seat's manufacturer guidance before reinstalling. The National Highway Traffic Safety Administration has published clear steps for deciding whether a seat can still be used.
Safety Rules You Should Not Skip
Car seat removal is a safety issue, not just a chore. Get it right and the next install will be solid. Get it wrong and your child's protection drops.
Keep these rules front and center.
LATCH Weight Limits
LATCH isn't designed to last forever. Most seats cap it at 65 pounds of combined child and seat weight. Some newer seats go higher, so check your manual for the exact number.
Once you pass the limit, switch to a seat belt installation for the seat's base. The vehicle seat belt has no such weight cap and will hold your child securely through the booster years.
Crash and Expiration Guidelines
Car seats expire. Most manufacturers set a six to ten year limit from the date of manufacture. The exact number is stamped into the seat shell, usually on the bottom or side.
If the seat was in a moderate or severe crash, the recommendation is usually to replace it. You might not see any damage, but the plastic can develop invisible stress fractures. Check the crash guidelines in your manual before reinstalling.
Also look at the seaf expiration guidelines to stay on top of that date.
Cleaning and Reinstalling After Removal
Once the seat is out, resist the urge to toss it in the garage. This is the perfect moment to clean it properly and inspect everything for wear.
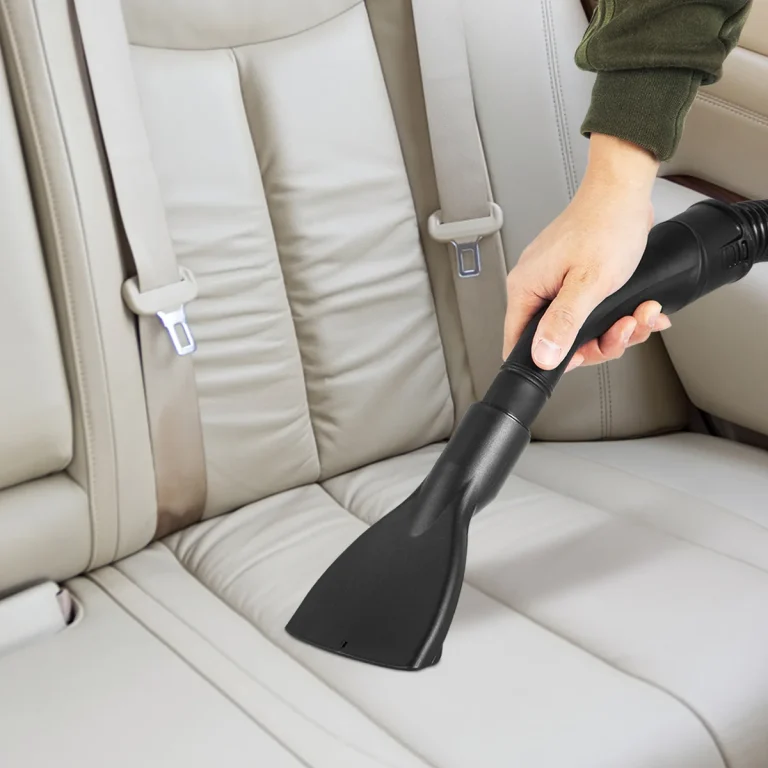
Vacuum the seat shell first, focusing on the belt paths and harness slots. Crumbs and sand get trapped there and can interfere with the straps over time.
For stains, follow the manual's cleaning instructions. Most seats allow only mild soap and water on the harness straps and shell. Never use harsh detergents or soak the webbing, since that can weaken it.
Check the lower anchor connectors, tether strap, and seat belt path for fraying or cracks. If anything looks damaged, call the manufacturer. And when you reinstall the seat, make sure you're following the age and weight guidance for forward-facing readiness.
Real-Life Scenarios: Switching Cars, Travel, and Selling
Switching seats between the family cars is the most common reason to remove one. With two vehicles, you'll probably do this a few times a month. A little practice turns it into a two-minute job.
For air travel, most airlines let you check a car seat for free. Remove the seat from the car and pack it in a padded bag. That protects the straps and shell from damage in the cargo hold.
Selling a used seat? Clean it thoroughly first. Note the model number and expiration date before you uninstall.
Buyer trust depends on that information.
Frequently Asked Questions
How long does it take to remove a car seat?
Infant carriers take about 15 seconds. Convertibles take two or three minutes the first time. After a few tries, it takes less than a minute.
Can I remove a car seat and reinstall it with LATCH again?
Yes, LATCH parts are fully reusable. Removing a seat causes no wear as long as you release the connectors properly. Just click them back in when you reinstall.
What if my infant carrier is stuck on the base?
Check the recline foot first. A locked foot can block the carrier from lifting free. Adjust it upright, then press the release lever.
Do I need tools to remove a car seat?
No. Every car seat removal uses finger pressure only. If you're reaching for a screwdriver, stop and read the manual.
Final Decision Guide: Remove It the Right Way, Every Time
The whole process boils down to four steps. Identify the seat type, release the top tether, detach the lower anchors or unthread the belt, then lift. Tether first, connectors second, lift last.
That order works for every seat on the market. And when in doubt, open the manual. It's the only text written by the engineers who designed your seat.
When your child grows out of the seat entirely, check the age rules for the front seat. And always keep the seat in the safest spot, which our placement guide explains in detail.