When to Switch to a Front-Facing Car Seat
You’re standing in the garage, staring at the car seat manual, and the big question hits you: when can you use a front facing car seat? You’ve heard age two somewhere, but your toddler just turned one and already looks cramped. Maybe a well-meaning relative already flipped the seat. The truth is, this decision isn’t just about a birthday or a number on a scale.
Get it wrong and the consequences aren’t a ticket, they’re safety-critical.
In our research, the American Academy of Pediatrics (AAP) has been clear since 2018: children should stay rear‑facing until at least age 2, and ideally until they max out the seat’s limits. As of 2026, most convertible seats on the market allow rear‑facing up to 40 or even 50 pounds. That’s a lot of room to grow before you flip.
Let’s walk through exactly what you need to check before making the switch.
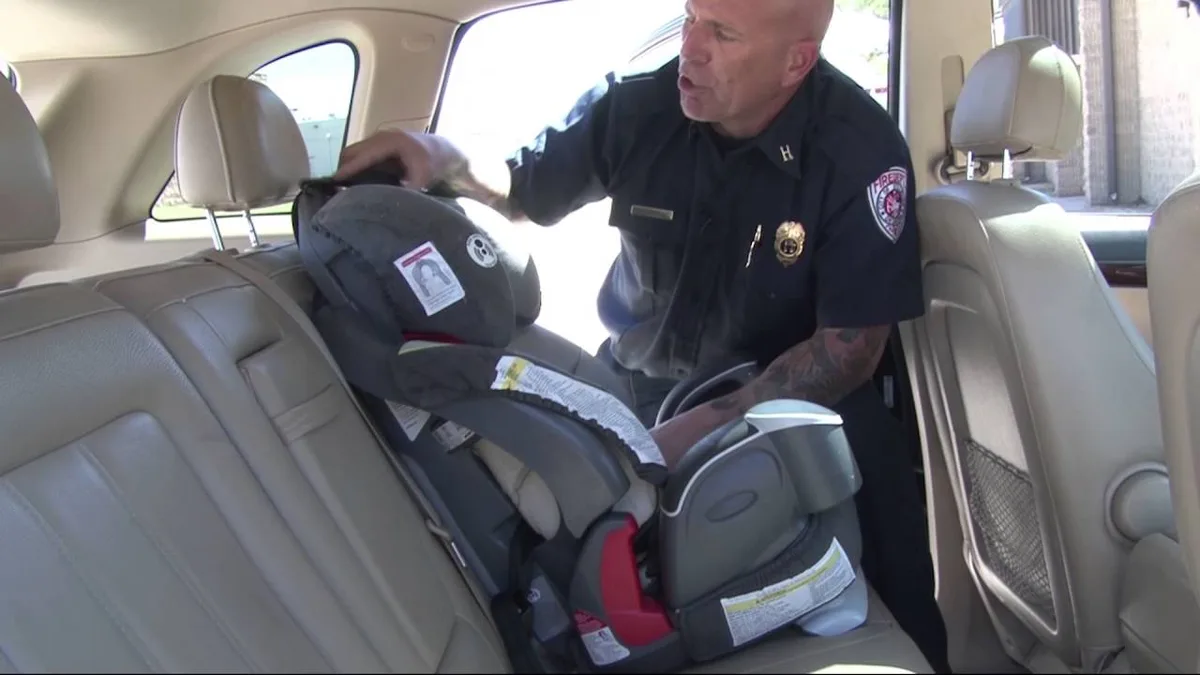
Image source: YouTube / StillwaterOKgov (YouTube thumbnail (fair-use with source credit))
Quick Answer: The Absolute Minimum vs. What’s Actually Safest
You can legally turn a child forward‑facing at age 1 and 20 pounds in most U.S. states. That is the bare minimum. The safest practice is to wait until your child reaches the maximum rear‑facing weight or height limit printed on the seat.
That’s often 40, 50 pounds and about 45 inches. Age alone is not a safety cutoff. Size and seat limits are what matter.
Why Getting This Right Matters More Than You Think
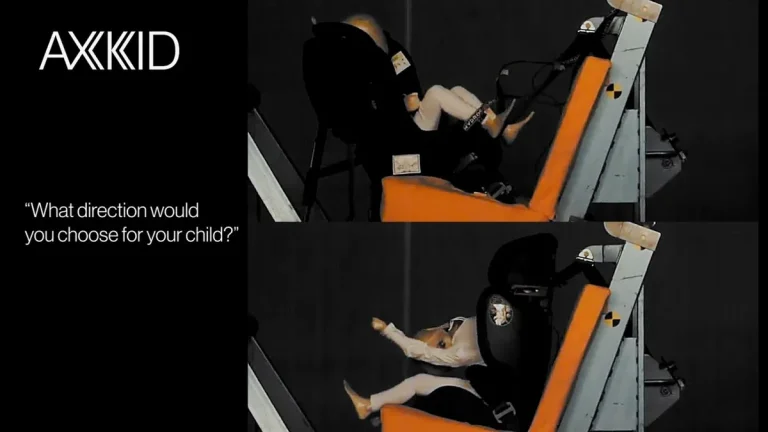
Every car seat is engineered to protect in a specific orientation. Rear‑facing seats cradle the head, neck, and spine during a crash. A forward‑facing seat relies on the harness and top tether to manage forward movement.
If you switch too early, your child’s neck and spinal cord face higher forces.
Data from the National Highway Traffic Safety Administration (NHTSA) shows that children under 2 are 75% less likely to be seriously injured when riding rear‑facing. That’s not a small number. It’s the difference between a scare and a hospital visit.
And here’s the hard part: car seats don’t have a magic “ready” light. You have to read the label, check the manual, and measure your child. That’s the only way to know for sure.
The Two Big Numbers You Need to Know (Weight & Height Limits)
Every car seat has two sets of limits: rear‑facing maximums and forward‑facing minimums. You need both numbers to decide when to turn.
Weight limits are straightforward. Look for the rear‑facing maximum weight on the seat label. It’s usually between 30 and 50 pounds.
Your child must be under that number to stay rear‑facing. For forward‑facing, the minimum is typically 20 to 22 pounds, but that’s just the legal floor, not the safe ceiling.
Height limits are trickier. Most seats have a height rule: the top of your child’s head must be at least 1 inch below the top of the seat shell when rear‑facing. Once that head gets within an inch, it’s time to turn, even if weight is fine.
Some seats also have a standing height limit (like 49 inches total). Check both.
Here’s a quick reference:
| Limit Type | Rear‑Facing (max) | Forward‑Facing (min) |
|---|---|---|
| Weight | 30–50 lbs | 20–22 lbs |
| Height | Head ≤ 1 in below shell top | Child fits harness at or above shoulders |
| Age | None specified by seats | 1 year (legal minimum) |
How to Read Your Car Seat Label Like a Pro

Every car seat has a white or yellow sticker somewhere on the side or back. That sticker is your cheat sheet. It lists:
- Model number and manufacture date
- Rear‑facing weight and height limits
- Forward‑facing weight and height limits
- Expiration date (usually 6, 10 years from manufacture)
Ignore the confusing marketing text around it. Find the section that says Rear‑Facing and note the maximum weight. Then find the Forward‑Facing section and note the minimum weight.
Your child must reach that minimum and meet the height requirement (harness slots at or above the shoulders) before you turn the seat.
A common mistake: parents see “20, 65 lbs” on the front of the box and assume their child is ready at 20 lbs. But that forward‑facing range only applies once you actually turn the seat. The seat can still be used rear‑facing up to 40+ lbs.
Don’t rush.
If you’ve already cleaned your seat or removed stains, double‑check that the label is still readable. Many upholstery cleaners can wear it down. If it’s faded, contact the manufacturer for a replacement sticker.
And if you’ve had to clean up after an accident, make sure you didn’t accidentally damage any safety markings, you can find helpful tips on cleaning messes without ruining the label in our guide on tackling tough stains.
Step-by-Step: How to Properly Switch to Forward‑Facing
When the numbers line up, follow this process exactly. Rushing it is where most parents slip.
1. Confirm Your Child Meets the Seat’s Forward‑Facing Minimums
Weigh your child on a scale, not a guess. Measure their height standing straight against a wall. Compare both numbers to the forward‑facing section of the seat label.
If they’re below the minimum, wait.
2. Adjust the Harness Straps
The harness must be in the slots that are at or slightly above your child’s shoulders. Rear‑facing uses lower slots. Forward‑facing uses higher slots.
Move them up now. If you’re unsure, check the manual for your model, each seat routes the harness differently.
3. Recline the Seat to the Forward‑Facing Position
Most convertible seats have a recline indicator. Forward‑facing is more upright than rear‑facing. Flip the foot or base to the correct angle.
The seat should sit flat on the vehicle seat.
4. Install Using the Correct Belt Path
Forward‑facing seats use a different belt path than rear‑facing. Route the vehicle seat belt or LATCH strap through the forward‑facing path (usually around the back of the seat, not through the rear‑facing slots). Tighten until there’s less than 1 inch of movement side‑to‑side at the belt path.
5. Attach the Top Tether
This is non‑negotiable. Every forward‑facing seat must be tethered. The top tether strap hooks to an anchor in your vehicle (usually on the back of the seat, ceiling, or floor).
Pull the strap tight. This reduces head movement by 50% in a crash.

6. Perform a Pinch Test
After tightening the harness, try to pinch the strap at the collarbone. If you can pinch any slack, it’s too loose. Tighten until there’s no ribbon of webbing to pinch.
The chest clip should be at armpit level.
A quick checklist:
- Harness slots at or above shoulders
- Recline angle correct for forward‑facing
- Seat moves less than 1 inch at belt path
- Top tether attached and tight
- Harness passes pinch test
- Chest clip at armpit level
One more thing: don’t assume the seat is ready just because it says “convertible.” The method above works for most convertible seats, but you should always defer to the manual. If you ever need to clean the seat after a spill, make sure you remove the cover properly and don’t miss any installation steps on reassembly, we have a separate guide that walks you through the cleaning process step by step.
Common Mistakes Parents Make When Turning the Seat
You’d be surprised how many experienced parents still slip up here. The most common error is turning before the child has fully outgrown the rear‑facing limits. Parents see “20 lbs” on the label and think it’s time.
But 20 lbs is the forward‑facing minimum, not the rear‑facing maximum. If your seat allows rear‑facing up to 40 lbs, stay there.
Another big one: forgetting to move the harness straps up. Rear‑facing straps come from below the shoulders. Forward‑facing straps come from at or above the shoulders.
If you leave them in the lower slots, the harness won’t hold the child properly in a crash.
Then there’s the top tether. Many parents simply don’t know what it is or assume it’s optional. It’s not.
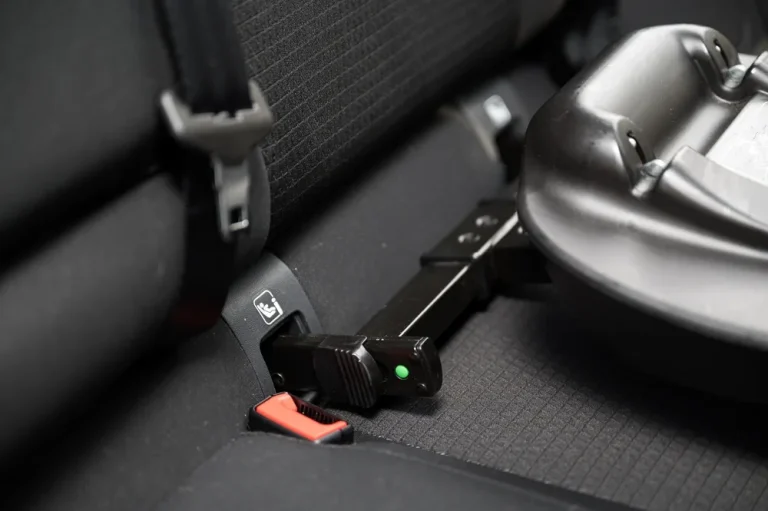
And some vehicles have tether anchors hidden behind a panel or under a flap. Look for the icon, a child seat with a hook, in your vehicle manual.
Finally, using LATCH when the combined weight (child + seat) exceeds the vehicle’s LATCH limit. That’s a hidden danger we’ll cover in detail below.
State Laws vs. Best Practice: What You’re Required to Do vs. What’s Recommended
State laws are the absolute floor. They exist so no child is in an unsafe seat by legal definition. But they lag behind the best science by years.
For example, most states require a child to be at least 1 year old and 20 pounds to ride forward‑facing. A handful of states have bumped the age to 2. A few more tie it to height or weight.
But none of them reflect the AAP’s recommendation to keep children rear‑facing until they max out the seat’s limits, which can be up to 50 pounds.
Here’s what you actually need to know: comply with your state law, then follow best practice. The law keeps you out of trouble with a ticket. The best practice keeps your child safest.
If you live in a state where the law says 1 year and 20 lbs, you are allowed to turn, but you should wait.
Check your specific state’s law at the Governor’s Highway Safety Association or your local DMV website. But don’t let the law be your only guide.
The Top Tether Isn’t Optional—Here’s Why
That third strap hanging off the back of the seat? It’s not extra packaging. The top tether reduces a child’s head and neck movement by up to 50% in a crash.
Without it, the seat can rotate forward as much as 4 to 6 inches more.
Federal regulation FMVSS 213 requires all forward‑facing seats to be tested with the top tether. The harness does its job, but the tether does the heavy lifting of controlling the seat’s movement.
Every vehicle made after 2002 has a tether anchor in every seating position. For older vehicles, check the manual. Some anchors are behind the seat cushion, on the rear shelf, or on the ceiling.
If you can’t find it, your vehicle manual has a diagram.
The tether must be hooked and tightened so there’s no slack. It doesn’t need to be cranked to the point of bending the anchor, but it should be snug. If you’re using the vehicle seat belt instead of LATCH, you still attach the top tether.
There’s no exemption.
When to Keep Rear‑Facing Longer (Even Past Age 2)
The AAP says at least age 2. But “at least” means longer is better. Many convertible seats allow rear‑facing up to 40, 45, or even 50 pounds.
That often covers a child up to age 3 or 4.
Why keep going? Because the bones in a toddler’s neck and spine are still soft. The spinal column isn’t fully ossified until around age 4 or 5.
Rear‑facing spreads crash forces across the entire back and head, rather than pulling on the neck.
Leg comfort is the number one reason parents turn early. But children are flexible. They fold their legs, cross them, or stick them over the sides.
There’s no data showing that rear‑facing legs are at higher risk of injury. In fact, the risk of leg injury is higher in forward‑facing because the legs can slap against the seat in front.
So if your child is 2.5 years old, fits comfortably in the rear‑facing position, and still has room in weight and height, keep them there. You’re not behind schedule. You’re ahead of the curve.
LATCH Weight Limits: A Hidden Gotcha in Forward‑Facing Mode
LATCH is convenient. But it has a weight limit that catches many parents off guard. The lower anchors in your vehicle are rated to hold a certain combined weight: child + car seat.
For most vehicles, that limit is 65 pounds total.
A typical forward‑facing convertible seat weighs 15 to 25 pounds. So if your child weighs 40 pounds, you’re at 55 to 65 pounds combined. That means you might be right at the limit or exceeding it.
Once you exceed the LATCH limit, you must switch to the vehicle seat belt for installation. The seat belt has no weight cap. This is not a suggestion.
It’s written in nearly every car seat manual.
How do you know the LATCH limit for your vehicle? Check the owner’s manual or look for a sticker near the anchor. Some vehicles use a 65‑lb limit.
Others go to 75 or even 80 lbs. If you can’t find it, use the seat belt. It’s safer to avoid LATCH at high weights than to risk anchor failure.
If you’ve already installed using LATCH and your child is approaching that weight, switch now. The seat belt route is slightly different but just as secure when done correctly. And it’s a one‑time change, once you switch, you stay on the belt until the seat is outgrown.
What About My Child’s Legs? (The Comfort Myth)
“They look so cramped back there.” That’s the number one reason parents turn early. But here’s the truth: children are remarkably flexible. They fold their legs, cross them, or stick them over the sides of the seat.
There’s no evidence that rear‑facing leg positions cause injury.
In fact, the greater leg risk comes forward‑facing. In a crash, forward‑facing legs can slap into the seat ahead, causing fractures. Rear‑facing legs simply tuck or bend naturally.
Your child will figure out comfort on their own. They won’t complain unless they’re truly uncomfortable, and discomfort usually means it’s time to size up, not turn around.
If your child is genuinely upset about leg room, check the seat recline angle. A slightly more reclined position can give extra space. Also, ensure the harness isn’t too tight across the hips.
That’s a comfort issue, not a leg issue.
Expert Tips from Certified Child Passenger Safety Technicians
CPSTs see hundreds of installations a year. Here’s what they wish every parent knew:
- The harness should be snug enough that you can’t pinch any webbing at the collarbone. Loose harnesses are the most common mistake. Check it every time you buckle.
- Twist the buckle stalk. If the vehicle buckle sits in an awkward spot, twist it up to three full turns to shorten the stalk. Check your manual first.
- Use a rolled towel for leveling. If the seat doesn’t sit level on the vehicle seat, a tightly rolled towel under the front edge can help. Don’t use pool noodles or loose padding.
- Never add aftermarket accessories. No extra padding, head supports, or strap covers unless the seat manufacturer includes them. They interfere with crash performance.
- Bring your seat to a free check event. NHTSA lists local inspection stations. A CPST will verify your installation in about 20 minutes.
One more tip: if you’re traveling and need to handle cleaning messes on the road, the same principles apply, remove the cover, clean gently, and reinstall carefully without missing any steps.
Real Scenario: A 2-Year-Old vs. a 35-Pound Toddler—When Each Should Turn
Let’s make this concrete. Two different children, two different decisions.
Child A: Age 2, weight 24 lbs, convertible seat with rear‑facing limit of 40 lbs. This child has plenty of room in weight. The head is 3 inches below the top of the shell. They stay rear‑facing.
Age 2 is the minimum recommendation, not a switch‑by date. This child can easily ride rear‑facing until age 3 or 4.
Child B: Age 2.5, weight 35 lbs, same seat with a rear‑facing limit of 40 lbs. This child is close to the weight limit. But they haven’t reached it yet. If the head clearance is still good, they can continue rear‑facing for another few months.
Once they hit 40 lbs, it’s time to turn.
Now consider Child C: Age 18 months, weight 28 lbs, but head is within 1 inch of the shell top. This child must turn now, regardless of age. Height limits are just as binding as weight limits.
Each decision boils down to three checks: weight, height, and age (in that order).
Frequently Asked Questions
Can I turn my 1-year-old forward-facing if the state law says 12 months?
Yes, you legally can. But safety experts recommend waiting until at least age 2. The AAP says the minimum is 2 years.
Your child’s neck bones are still fusing. Extended rear‑facing reduces injury risk by over 70%.
Does a convertible seat automatically work forward-facing at any weight?
No. A convertible seat must be switched to forward‑facing mode by moving the harness to the correct slots and using the forward‑facing belt path. Read the manual for your specific model.
Each seat has different steps.
My child’s head is above the top of the rear‑facing seat—is it time to turn?
Yes. If the top of your child’s head is within 1 inch of the seat shell top, you must switch to forward‑facing. This is a hard height limit, not a suggestion.
Ignoring it risks head and neck injury in a crash.
Do I need a new car seat for forward‑facing or can I just switch modes?
You can switch modes if you own a convertible or all‑in‑one seat. These seats are designed to work in both orientations. If you own an infant carrier only, you’ll need a new convertible or combination seat for forward‑facing.
Final Verdict: Use This 3-Step Decision Checklist Before You Flip the Seat
Make this your quick reference before any transition:
- Check the seat label. What are the rear‑facing maximum weight and height limits? Is your child still below both?
- Check the head rule. Is your child’s head at least 1 inch below the top of the seat shell when rear‑facing? If yes, you can wait. If no, it’s time.
- Check your state law. Does your state require a minimum age? Follow the law, but use the seat limits as your actual guide.
If all three point to “turn,” follow the installation steps earlier in this guide. And don’t forget the top tether.
If you need to remove the seat for cleaning or after a spill, we have a complete walkthrough that covers the full removal and reinstall process. Taking care of your seat extends its life and keeps it safe every ride.