What Age Do Kids Face Forward in a Car Seat?
If you're asking "what age do kids face forward in car seat," you've got company. It's one of the top questions new parents search for, and the answer isn't as simple as a single birthday. Your child's size, your car seat's limits, and your state's laws all play a role.
The American Academy of Pediatrics recommends keeping kids rear-facing until at least age 2, but many convertible seats allow rear-facing up to 40 or even 50 pounds. That can mean staying rear-facing well past the second birthday. Let's get straight to what you came for.

Quick Answer
Your child should face forward only after they have outgrown the rear-facing limits of their car seat. The safest minimum age is 2 years. Many seats let kids stay rear-facing longer.
That gives better protection in a crash.
Why This Decision Matters So Much
Turning a child forward-facing too early is one of the most common car seat mistakes parents make. It's understandable, your toddler's legs look cramped, they fuss on every ride, and you see other kids facing forward much younger. But the safety data is clear.
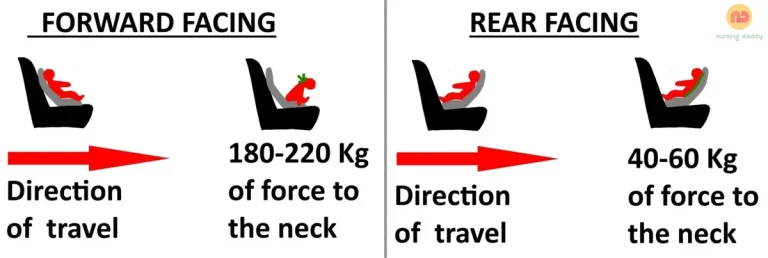
Rear-facing seats spread crash forces across the whole shell of the seat. A forward-facing harness concentrates those forces on the straps and the child's spine. For toddlers under 2, the neck and spinal column are still developing.
The risk of serious injury in a frontal crash drops dramatically when they stay rear-facing.
Research shows that children under 2 are about five times safer in a rear-facing seat than a forward-facing one. That statistic comes straight from the National Highway Traffic Safety Administration. It's not a small difference.
It's the kind of margin that can mean the difference between walking away and a hospital visit.
So yes, the decision matters. A lot.
The Core Facts: What the Experts Say
The American Academy of Pediatrics (AAP) updated its guidance in 2018 to recommend that children remain rear-facing until they reach the highest weight or height allowed by their car seat. That's often well past age 2. Many convertible seats have rear-facing limits of 40, 45, or even 50 pounds.
Here's the breakdown of what the experts agree on:
- The minimum legal requirement in most US states is 1 year and 20 pounds. That's the floor, not the ceiling.
- The best practice recommendation from the AAP is to keep kids rear-facing until at least age 2, and longer if the seat allows.
- The actual limit is printed on a sticker on the side of your car seat. That sticker tells you the maximum height and weight for rear-facing use.
- Once your child exceeds either number, they must move to forward-facing mode. Before that, they're still safer rear-facing.
The gap between the legal minimum and the safest practice is where confusion lives. Many parents see "1 year and 20 pounds" and think it's time to flip. But that's just the earliest allowable point, not the recommended one.
Your convertible seat almost certainly allows rear-facing well beyond that. Use that margin.
If you're shopping for a new seat, checking the safety ratings on convertible seats can help you choose one that offers a higher rear-facing weight limit.
How to Know Your Child Is Ready to Face Forward
The answer isn't a specific birthday. It's a combination of your child's measurements and your seat's specifications. Follow this checklist to decide.
Check the Rear-Facing Limits on Your Seat
Every car seat has a label, usually on the side or back, that lists the rear-facing weight and height maximums. For example:

- Weight limit: Many convertible seats max out at 40, 45, or 50 pounds when rear-facing.
- Height limit: Usually 40 to 49 inches, or the point where the child's head is within 1 inch of the top of the seat shell.
If your child is below both limits, they can stay rear-facing. That's safer.
Signs Your Child Has Outgrown Rear-Facing
- Their head is less than an inch from the top of the seat shell.
- They exceed the weight limit for rear-facing.
- Their shoulders are above the lowest harness slots (but that usually means they're too small for forward-facing, so use the head clearance as the primary marker).
If any of those are true, it's time to switch.
The One-Year, Twenty-Pound Baseline
Every state sets a legal minimum: at least 1 year old AND at least 20 pounds. But again, that's the earliest, not the wisest. If your child meets that but still fits the rear-facing limits of their seat, keep them rear-facing.
For example, a 14-month-old who weighs 22 pounds can legally face forward. But if their convertible seat allows rear-facing up to 40 pounds, they'll be much safer staying put.
The general rule of thumb: turn only when you have to. Not when you can.
The Step-by-Step Transition Process
Ready to make the switch? Follow these six steps carefully.
Step 1: Confirm All Three Criteria
- Your child is at least 1 year old (check your state law).
- Your child weighs at least 20 pounds (most seats require this minimum for forward-facing).
- Your child has outgrown the rear-facing height or weight limit on the seat's label.
If any of these isn't met, don't turn yet.
Step 2: Set Up the Seat for Forward-Facing Mode
Most convertible seats have different belt paths and recline angles for rear-facing and forward-facing. Read your owner's manual. The forward-facing mode typically requires:
- The harness straps to be in slots at or above your child's shoulders (rear-facing uses slots below).
- The recline angle to be more upright (check the built-in level indicator).
Step 3: Install the Seat in Your Vehicle
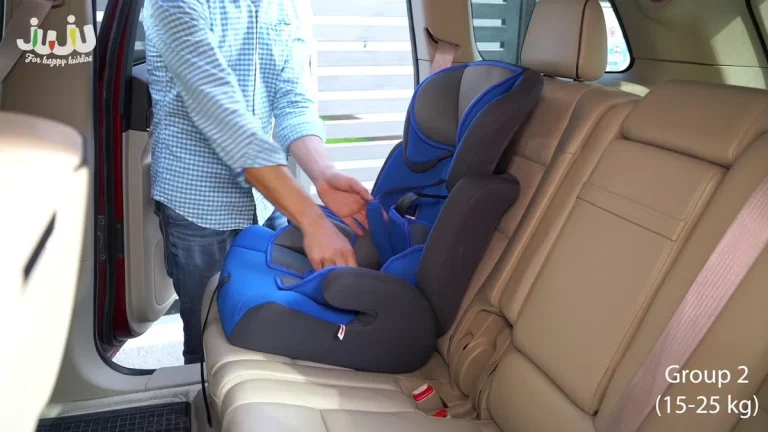
Position the seat forward-facing in the back seat. Secure it with either the seat belt or the LATCH system, following the manual. For forward-facing installations, you must also attach the top tether.
The top tether is a strap that hooks to an anchor point behind the seat. It dramatically reduces how far the child's head moves forward in a crash. Skipping it is a major safety gap.
Step 4: Tighten and Check the Harness
Place your child in the seat. Buckle the harness and tighten until you cannot pinch any webbing at the shoulder (the "pinch test"). The chest clip should be at armpit level.
Step 5: Double-Check for Any Movement
Grasp the seat at the base near the belt path. Push and pull firmly. It should not move more than one inch in any direction.
If it shifts, reinstall.
Step 6: Verify Everything Every Time
Car seat installations can loosen over time. Before every ride, check the harness tightness and the seat's solidity. It takes seconds.
If you're unsure about your installation, schedule a check with a Certified Child Passenger Safety Technician (CPST). Many fire stations and police departments host free clinics.
We also have a guide on keeping the seat itself clean and stain-free which helps maintain the harness and buckle function after spills.

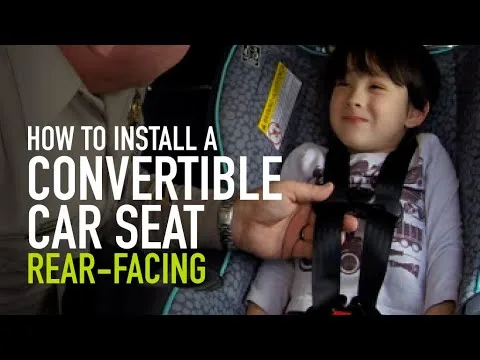
Image source: YouTube / heekin car seat (YouTube thumbnail (fair-use with source credit))